As I’ve been spending more time at the cabin, preparing for retirement you know, I have realized that the entire water system needed an overhaul. Truth be told, I realized this years ago, but didn’t want to open that shaken can of coke. It wasn’t like there was 1 big problem with it. It was a shit system from the start.

I had already made some “minor” changes to the system. Originally, there was a 30 gallon hot water tank with no separate shut off valves. Whenever you turned on the water, if would fill the tank. And everytime you had to winterize the cabin, you had to drain the tank. 30 gallons draining through a 3/8″ hose took a LONG time. It made late fall through early spring visits rough as you had to winterize if the weather planned to get close to freezing while you were away.
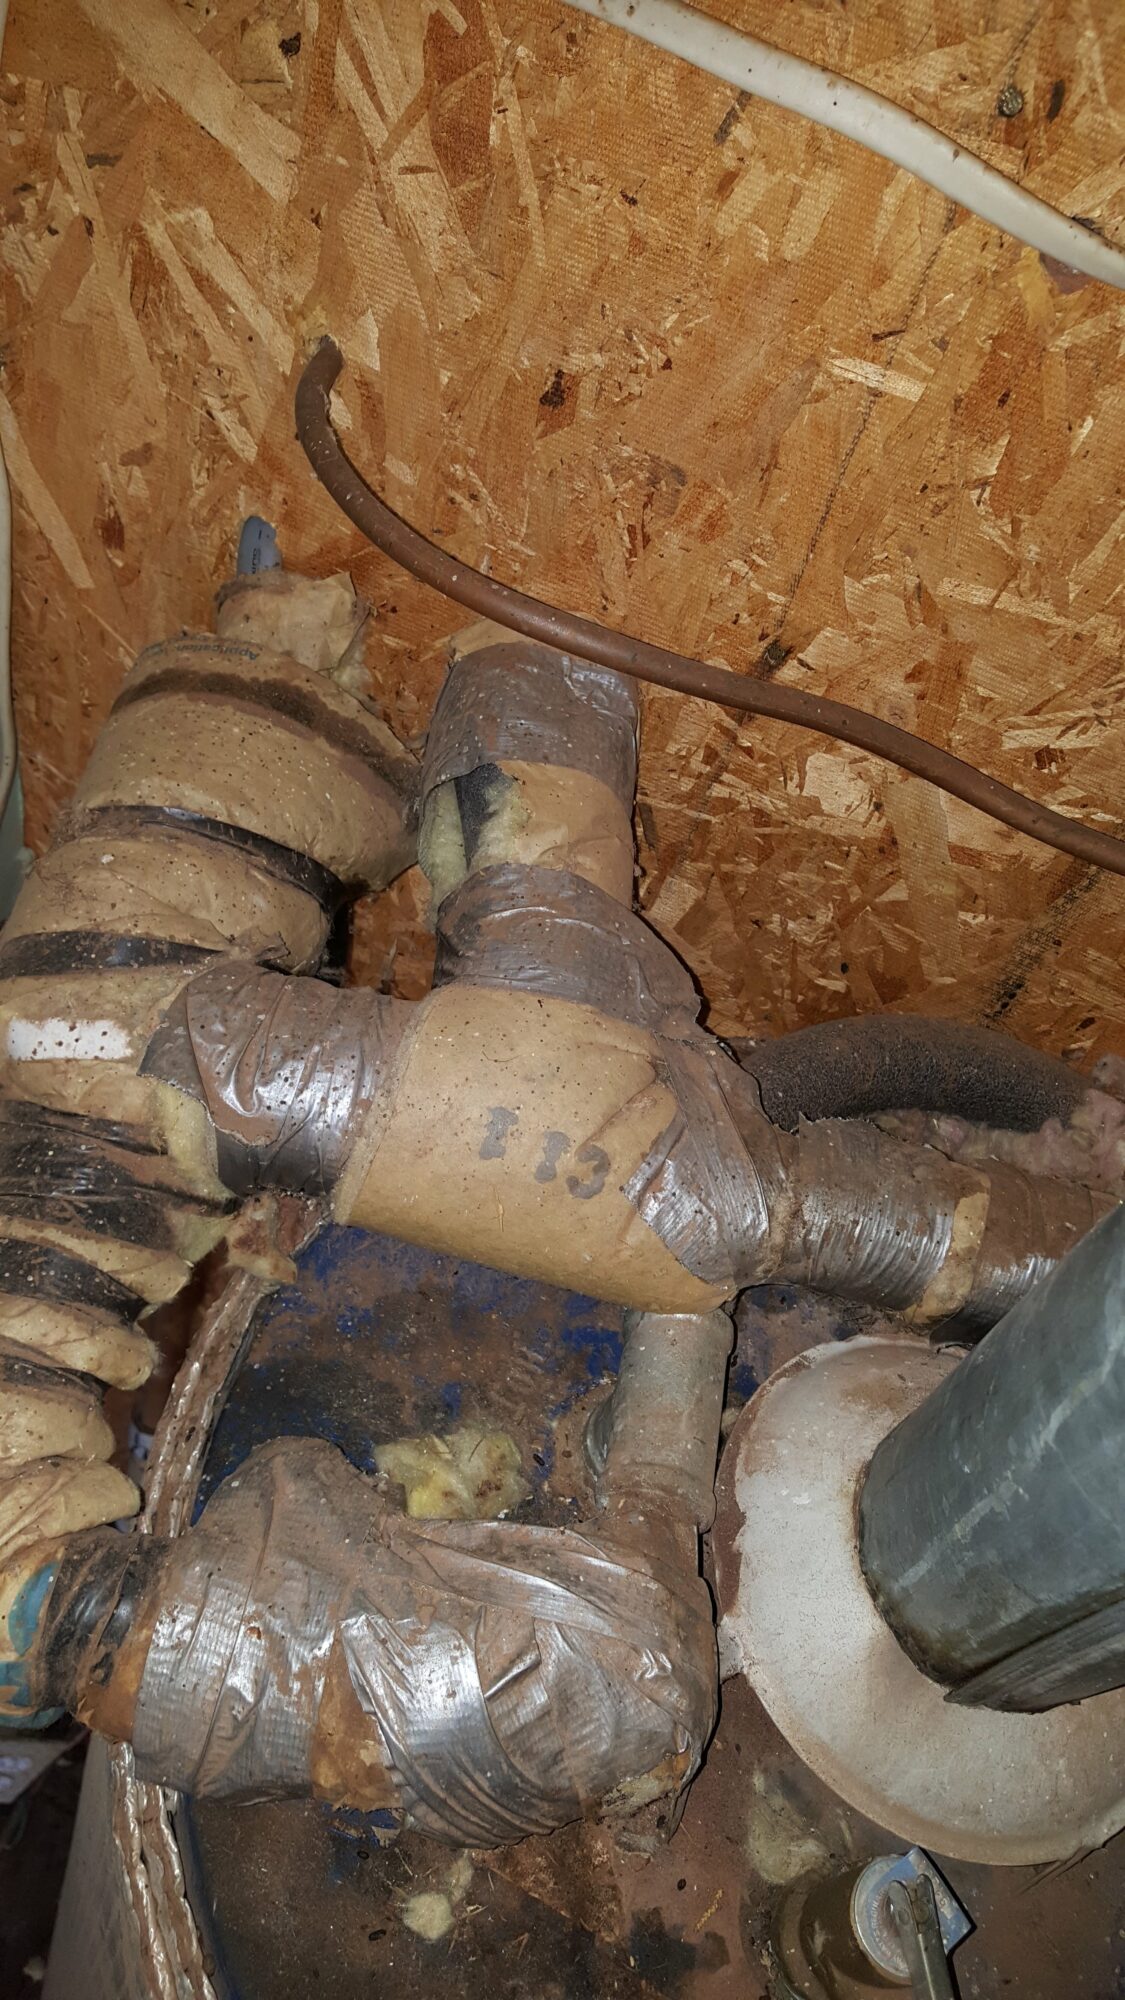
Initially, I had put in a valve to shut off the water supply to the tank. This was not as straightforward as you might think as it was a mess of old iron pipe and dried pvc all surrounded by wall insulation and wrapped in duct tape. It was a joy. (Sarcasm).
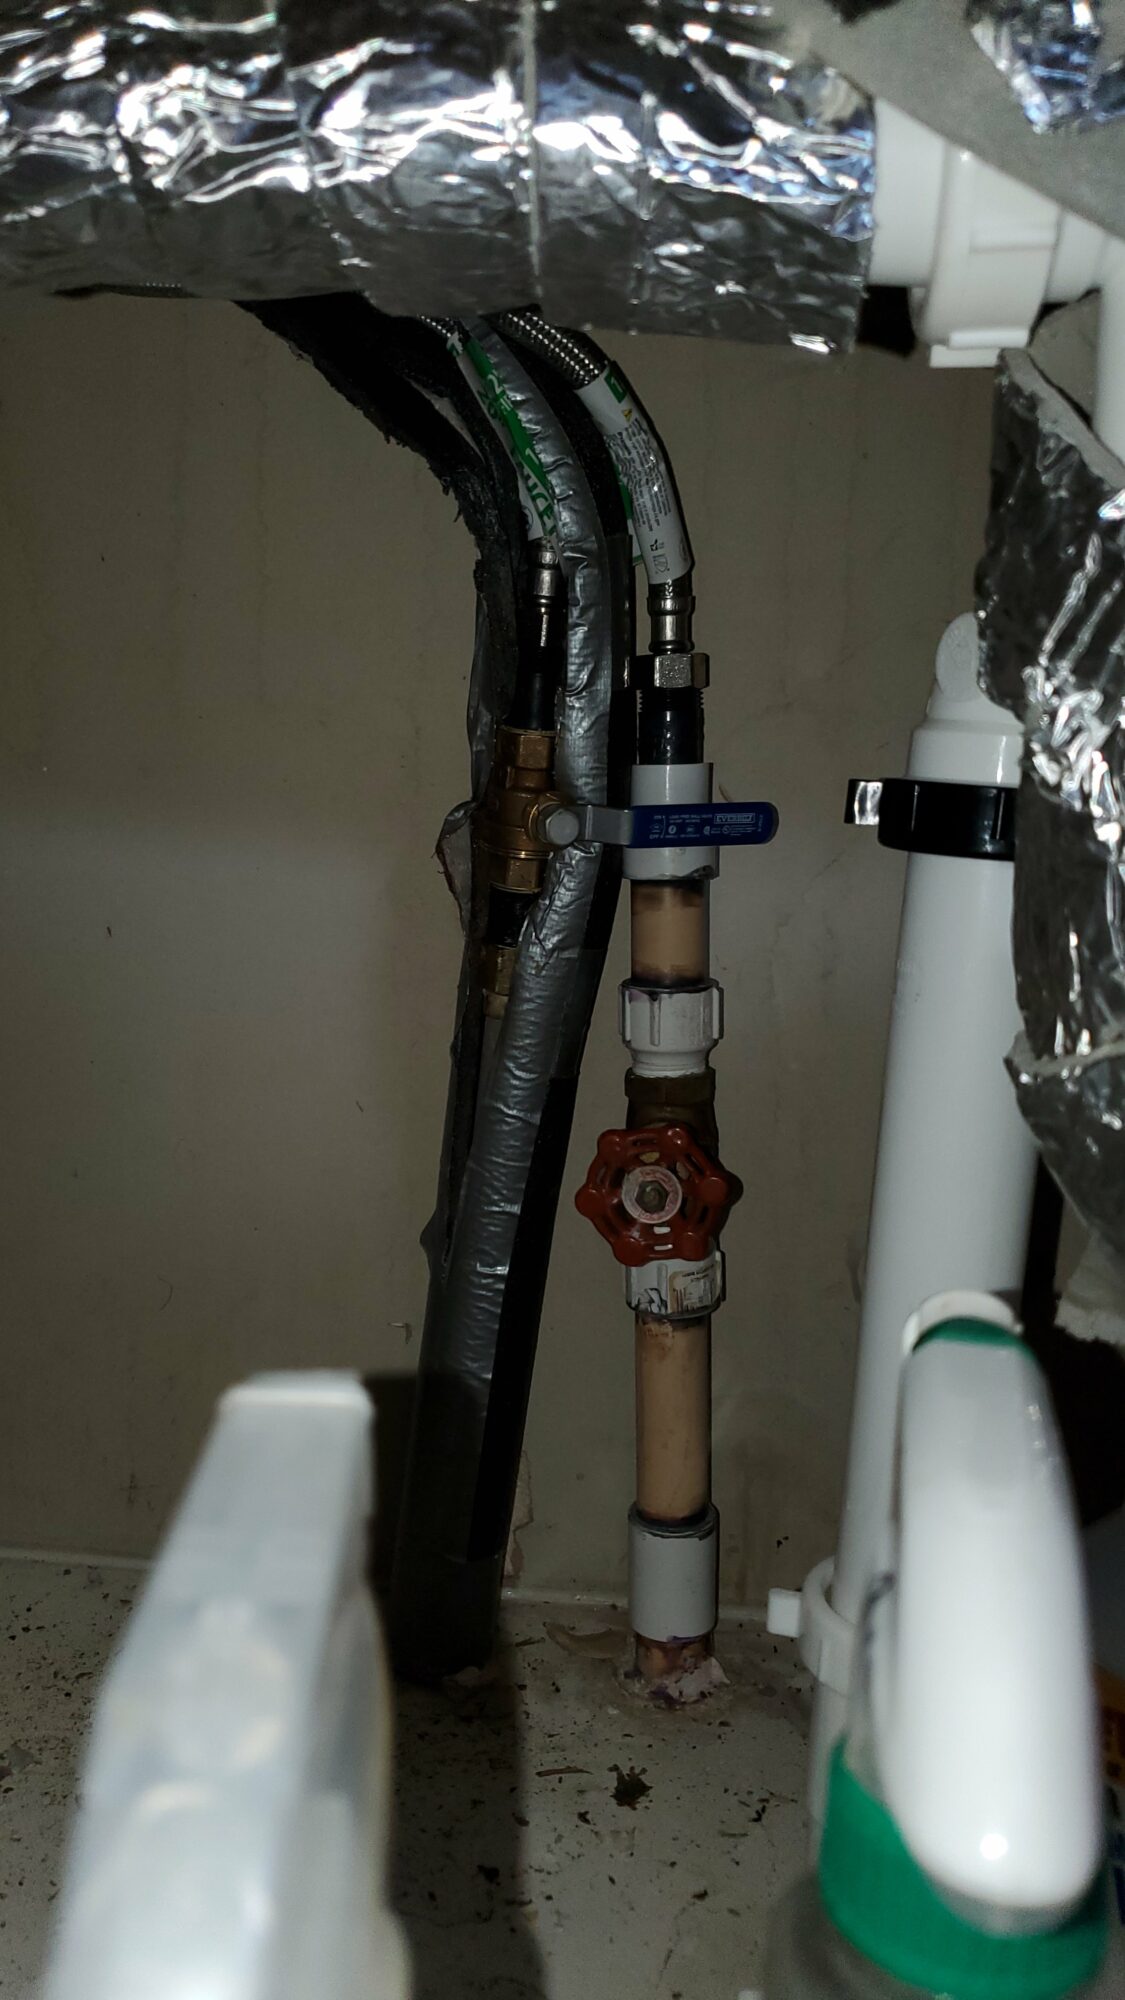
During this time I realized another issue with the system. There was no shutoff valve for the hot water under the kitchen sink. Why was this an issue? The faucet had a standard one mixing handle valve. If you didn’t have the handle turned full cold (it spun 360 degrees), the mixing valve would allow the cold water supply to dump into the hot supply line and backfeed to the hot water tank. I discovered this when I heard it gurgling when Kim was at the sink. Great.

That issue was fixed two ways. First, I installed a two handle faucet for the sink. Second, I installed a shutoff valve for the hot water supply line. Just ignore the colors on the shutoff valves. The cold was pre-existing in red. The only valve at the store for the hot was blue. Why not? Let’s fuck with the next owners.
At some point, probably in a fit of rage, I disconnected and yanked out the hot water tank completely. Fuck it. It just made working in the water closet insanely difficult and was serving no purpose. It laid in the yard for 4 months. I may have kicked it a few times.
At this point, the hot water supply was completely disconnected. Which really wasn’t a big deal as I had never had hot water at the cabin before.
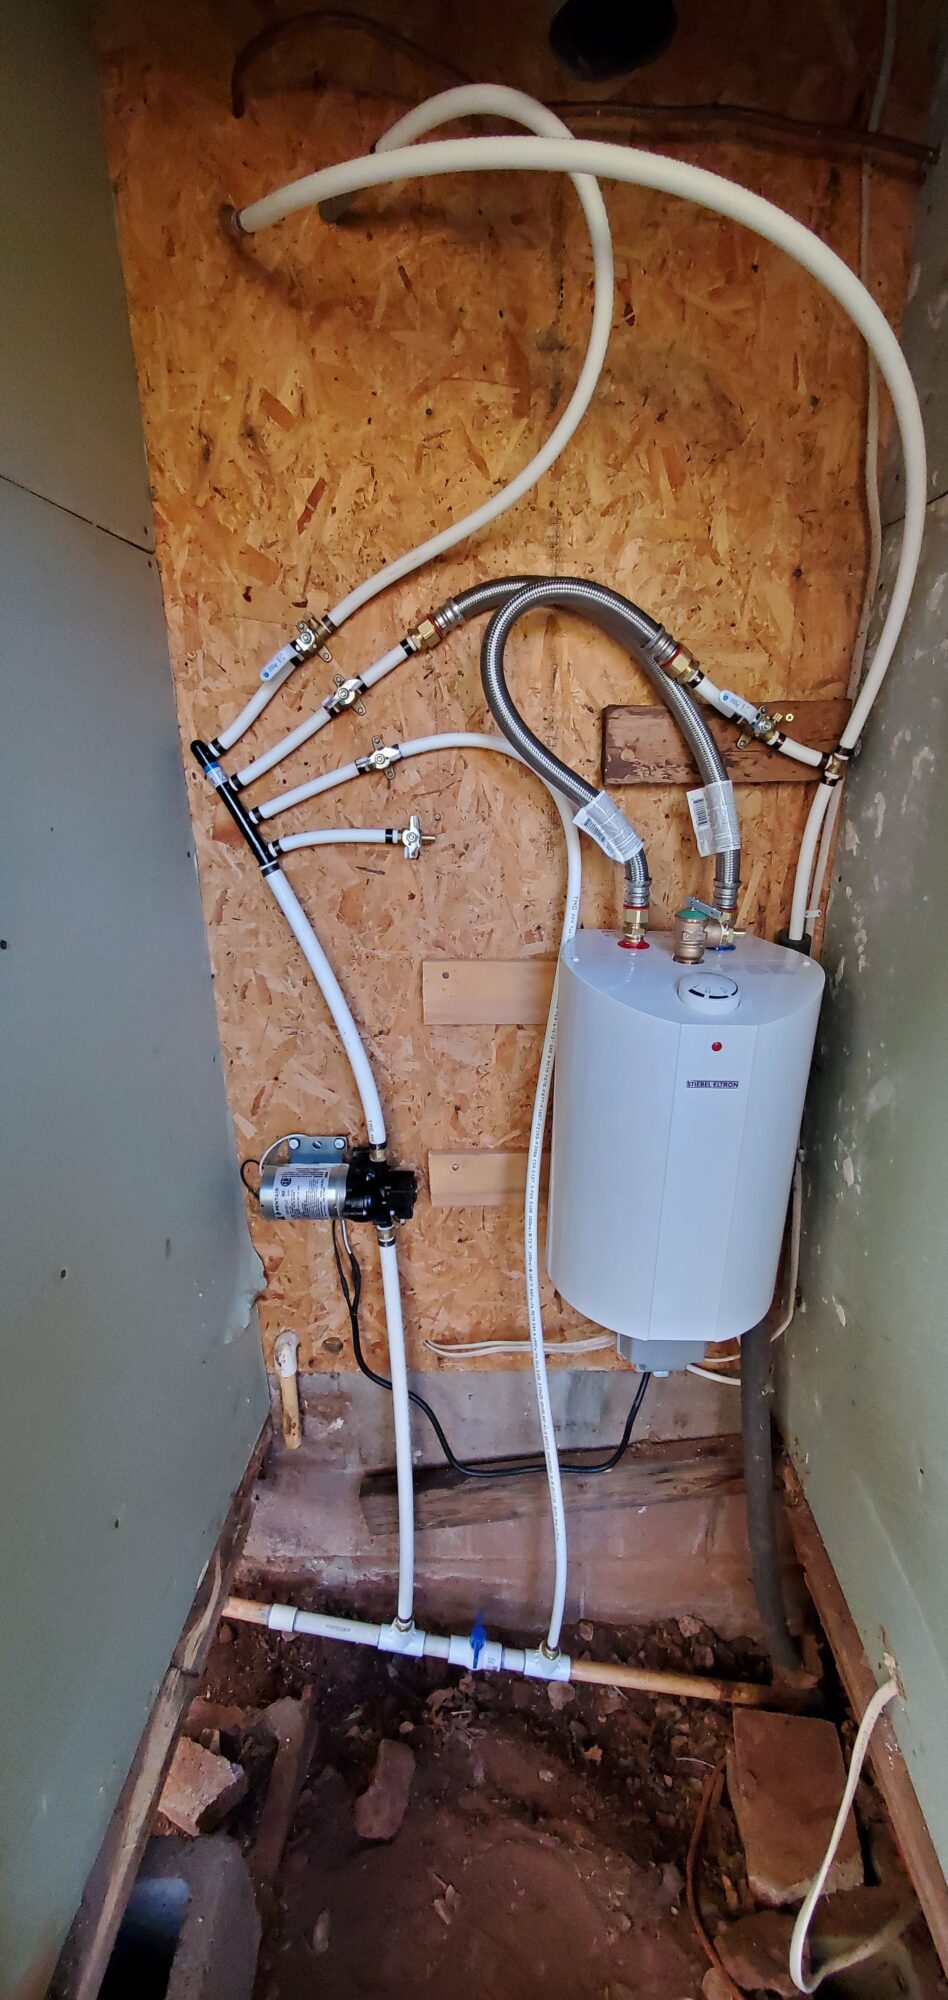
Some time later, I had run across a 2.5 gallon electric hot water tank that was wall mounted. This started the idea of revamping the entire water closet, which at this point was a single cold supply line with a valve that fed the bathroom. What I was planning was to completely redesign the inlet and distribution of the water.
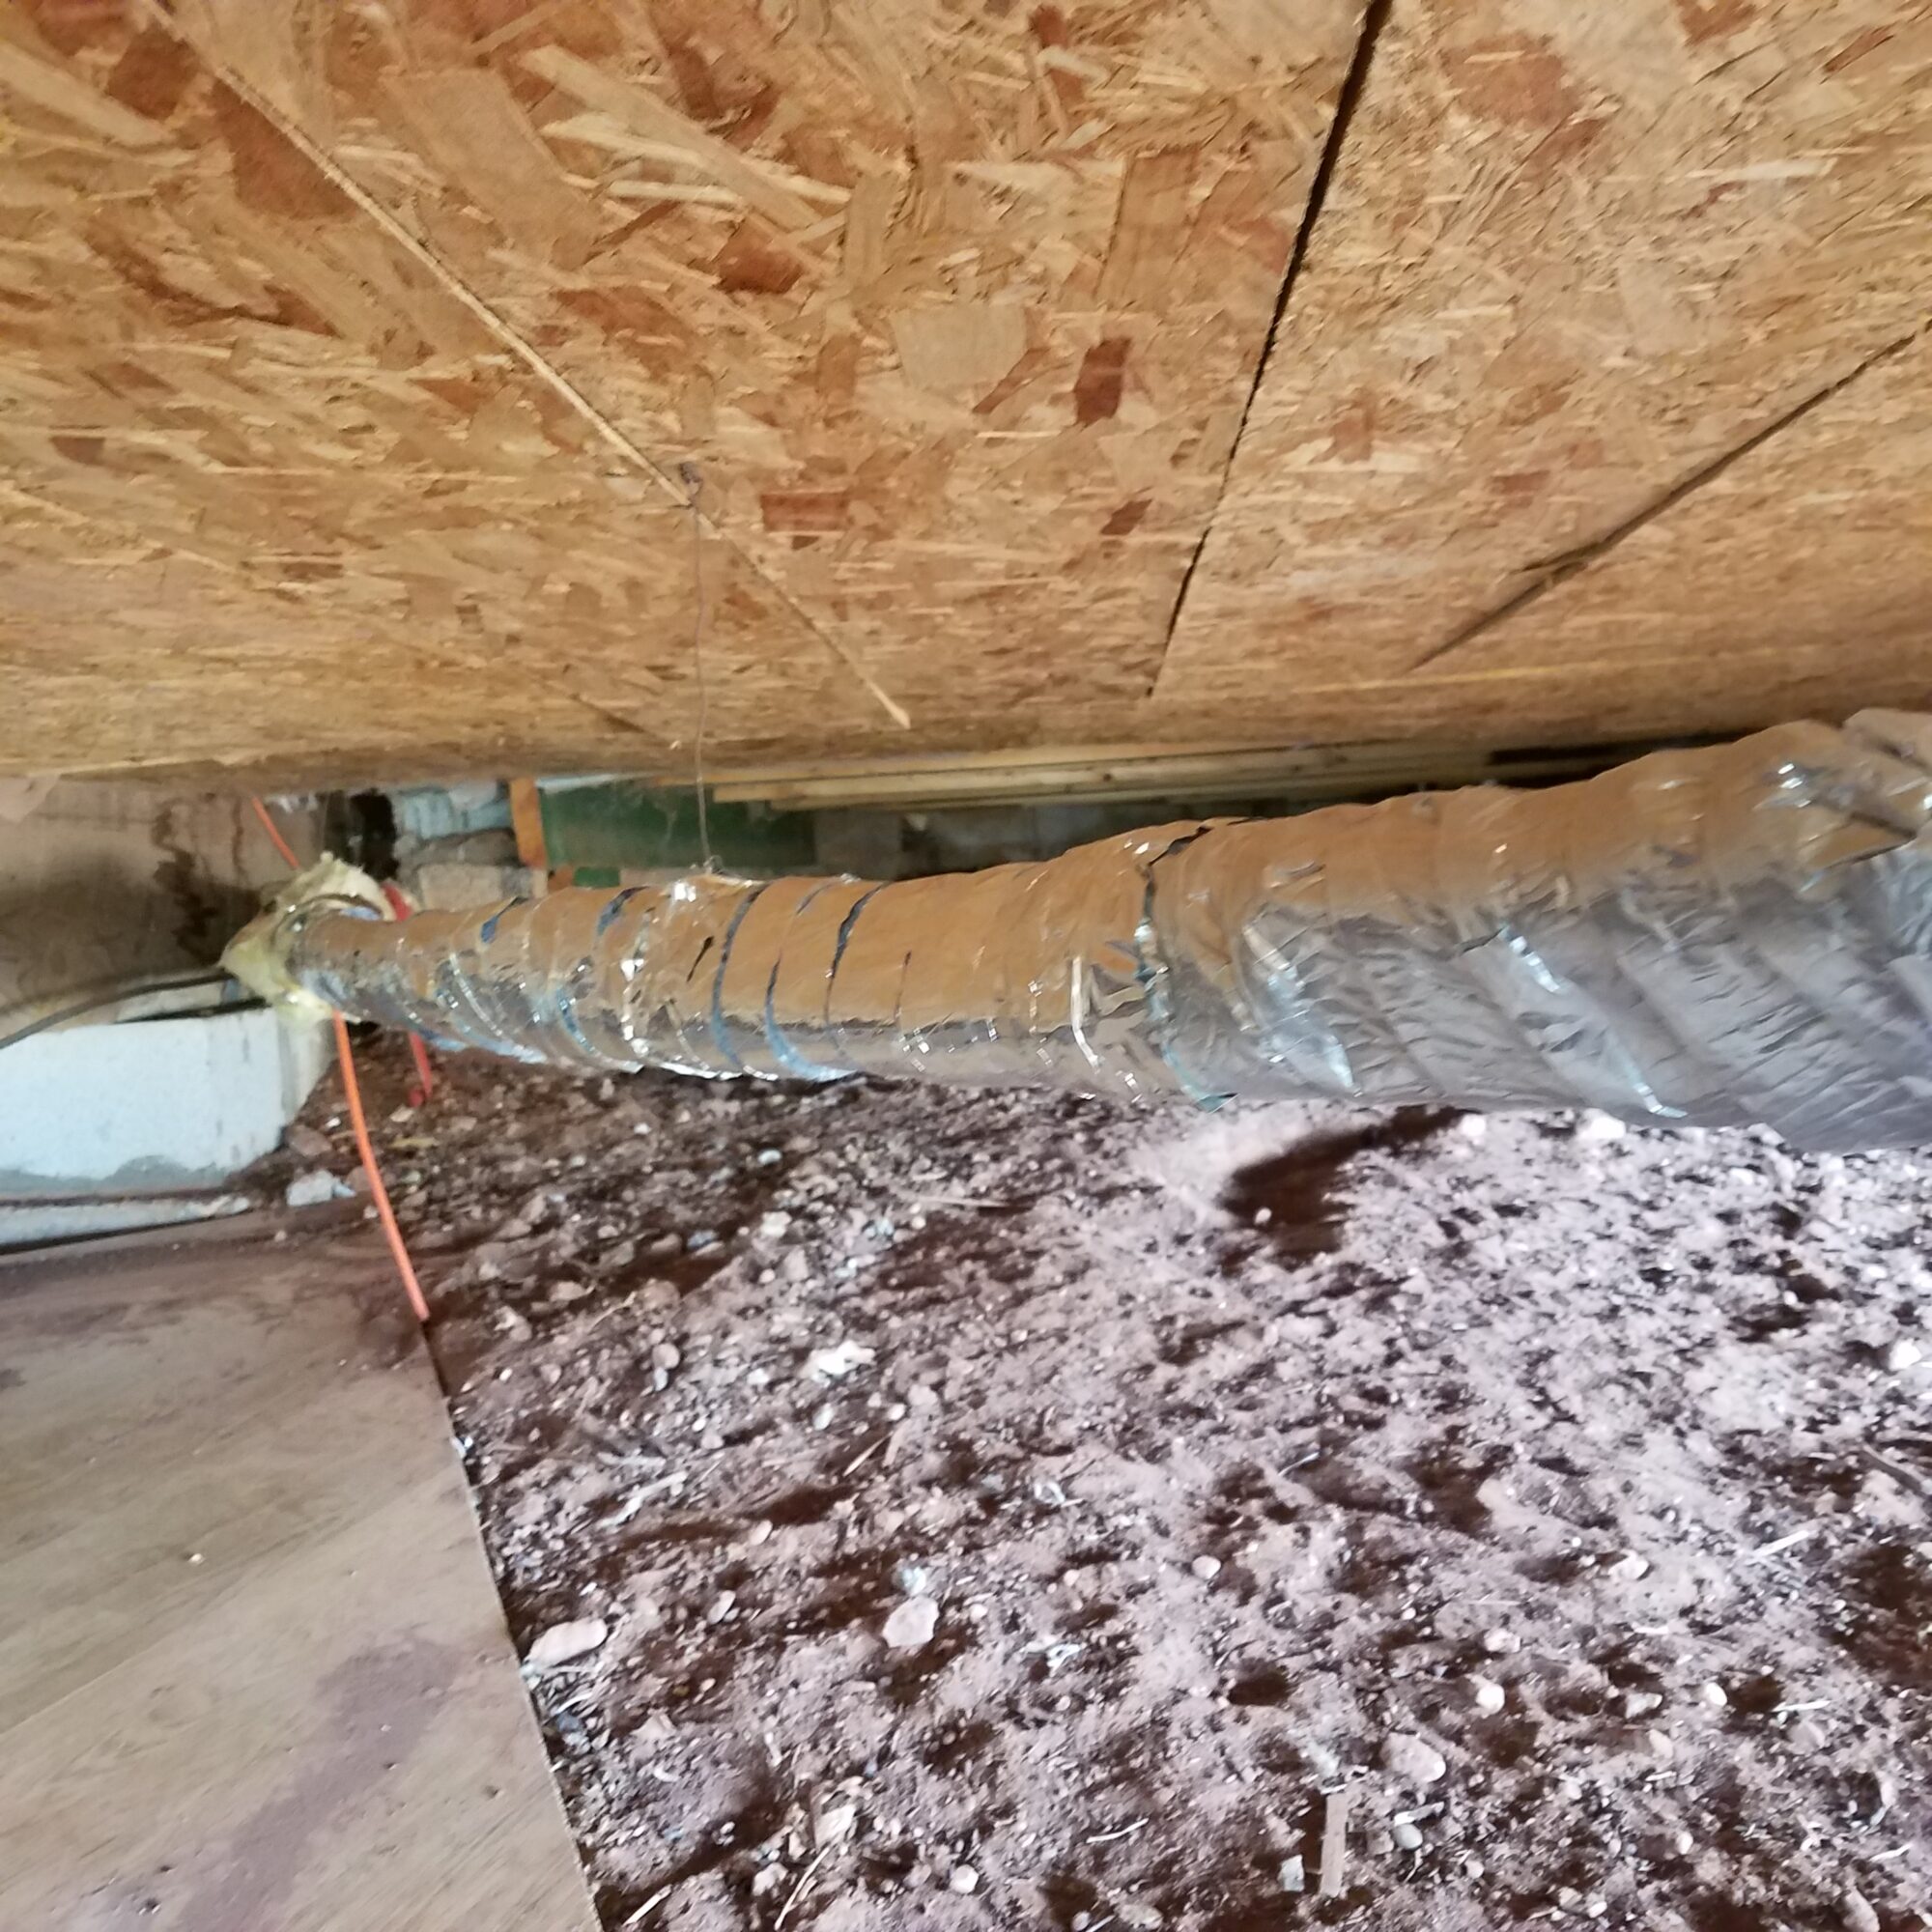
How to describe the original system. At the top of the hill is a water tank that gravity feeds the cabin with water. There was a shutoff valve at the tank. When it arrived to the cabin, the main line feeds straight through the underside of the cabin to the kitchen sink, with a single T under the water closet up to the bathroom supply and former hot water heater. While there was a shutoff valve in the water closet, there was no way to shut off the kitchen and run just the bathroom. Why would that be nice? The kitchen is about 3 feet in the air due to the slope of the ground. In fact most of the main line to the kitchen was dangling under the joists. Since there is no skirt around the front and side of the cabin, this exposes the main line to the cold winds of winter. Doubly bad as half of the pipe insulation had fallen off. Don’t worry. I fixed that years ago, but the issue is still there.

Oh, and there is a valve at the far end, just past the kitchen T. This is the main way to drain the entire cold supply. This is all PVC.
On the hot side, there were two PB (the cheap precursor to PEX) lines starting in the water closet. One to the bathroom and the other to the kitchen. The bathroom supply lines, both hot and cold, disappeared into the wall behind the water closet into the bathroom ceiling. The hot kitchen supply line dropped through the floor of the water closet and at some point transitioned to PVC to run next to the cold kitchen supply.
I should talk about the water closet. It was outside. Yup. Why have your water system inside where you might have, I dunno, HEAT in the wintertime, when you can make it difficult. I assume it was because the original hot water tank ran off propane, but whatever. It was just beside the main entrance to the cabin and was well insulated on the sides. It had a fairly substantial subfloor that the hot water tank sat on, about 18″ off the ground. There was no way to access the piping under the water closet. So I guess they just hoped for the best.
Another issue I should mention is that on the rare occasion that I did run the shower (twice in 5 years), water would seep out into the hallway in front of the shower. There was a little rectangle of trim that attempted to conceal a removable piece of drywall. And that’s where the water would seep out from. I removed this piece, but could only see the underside of the tub.
Now, my grand solution is not the perfect resolution to all my problems. Ideally, I’d have figured out a way to make the closet part of the inside of the cabin. Nope. That ain’t gonna happen. The plan was to make things better. It wouldn’t be hard.
My goals: install a pump for added pressure, add hot water tank, isolation of kitchen and bath circuits, and fix the shower. Here’s what I did.
First, I had to tear out the floor of the water closet as all the inlet piping was underneath it. 1.5″ tongue and groove boards. Nice and stout for the old hot water tank to sit on. It was covered in mouse and chipmunk shit. Joy. Under the floor is almost comical. The “base” of the cabinet is a wooden frame sitting on an U of cinderblocks. Most of the cinderblocks were loose and I start removing them. I remove all but one. That’s right. The entire closet is supported by a single block on one corner. We’ll, and the outside of the cabin acting as the back wall.
There was also three pieces of wood under the floor. The front was solid and supported by the one block and mounted to the sides. The back had been cut, possibly to allow the bathroom/hot water line up through the old floor. It just dangled from one side. The third piece was my favorite. A 4×4 post, spanning from left to right, just sitting atop the loose blocks. There is a chance that the weight of the hot water heater was enough to sag the floor onto it, but it couldn’t have been very effective.
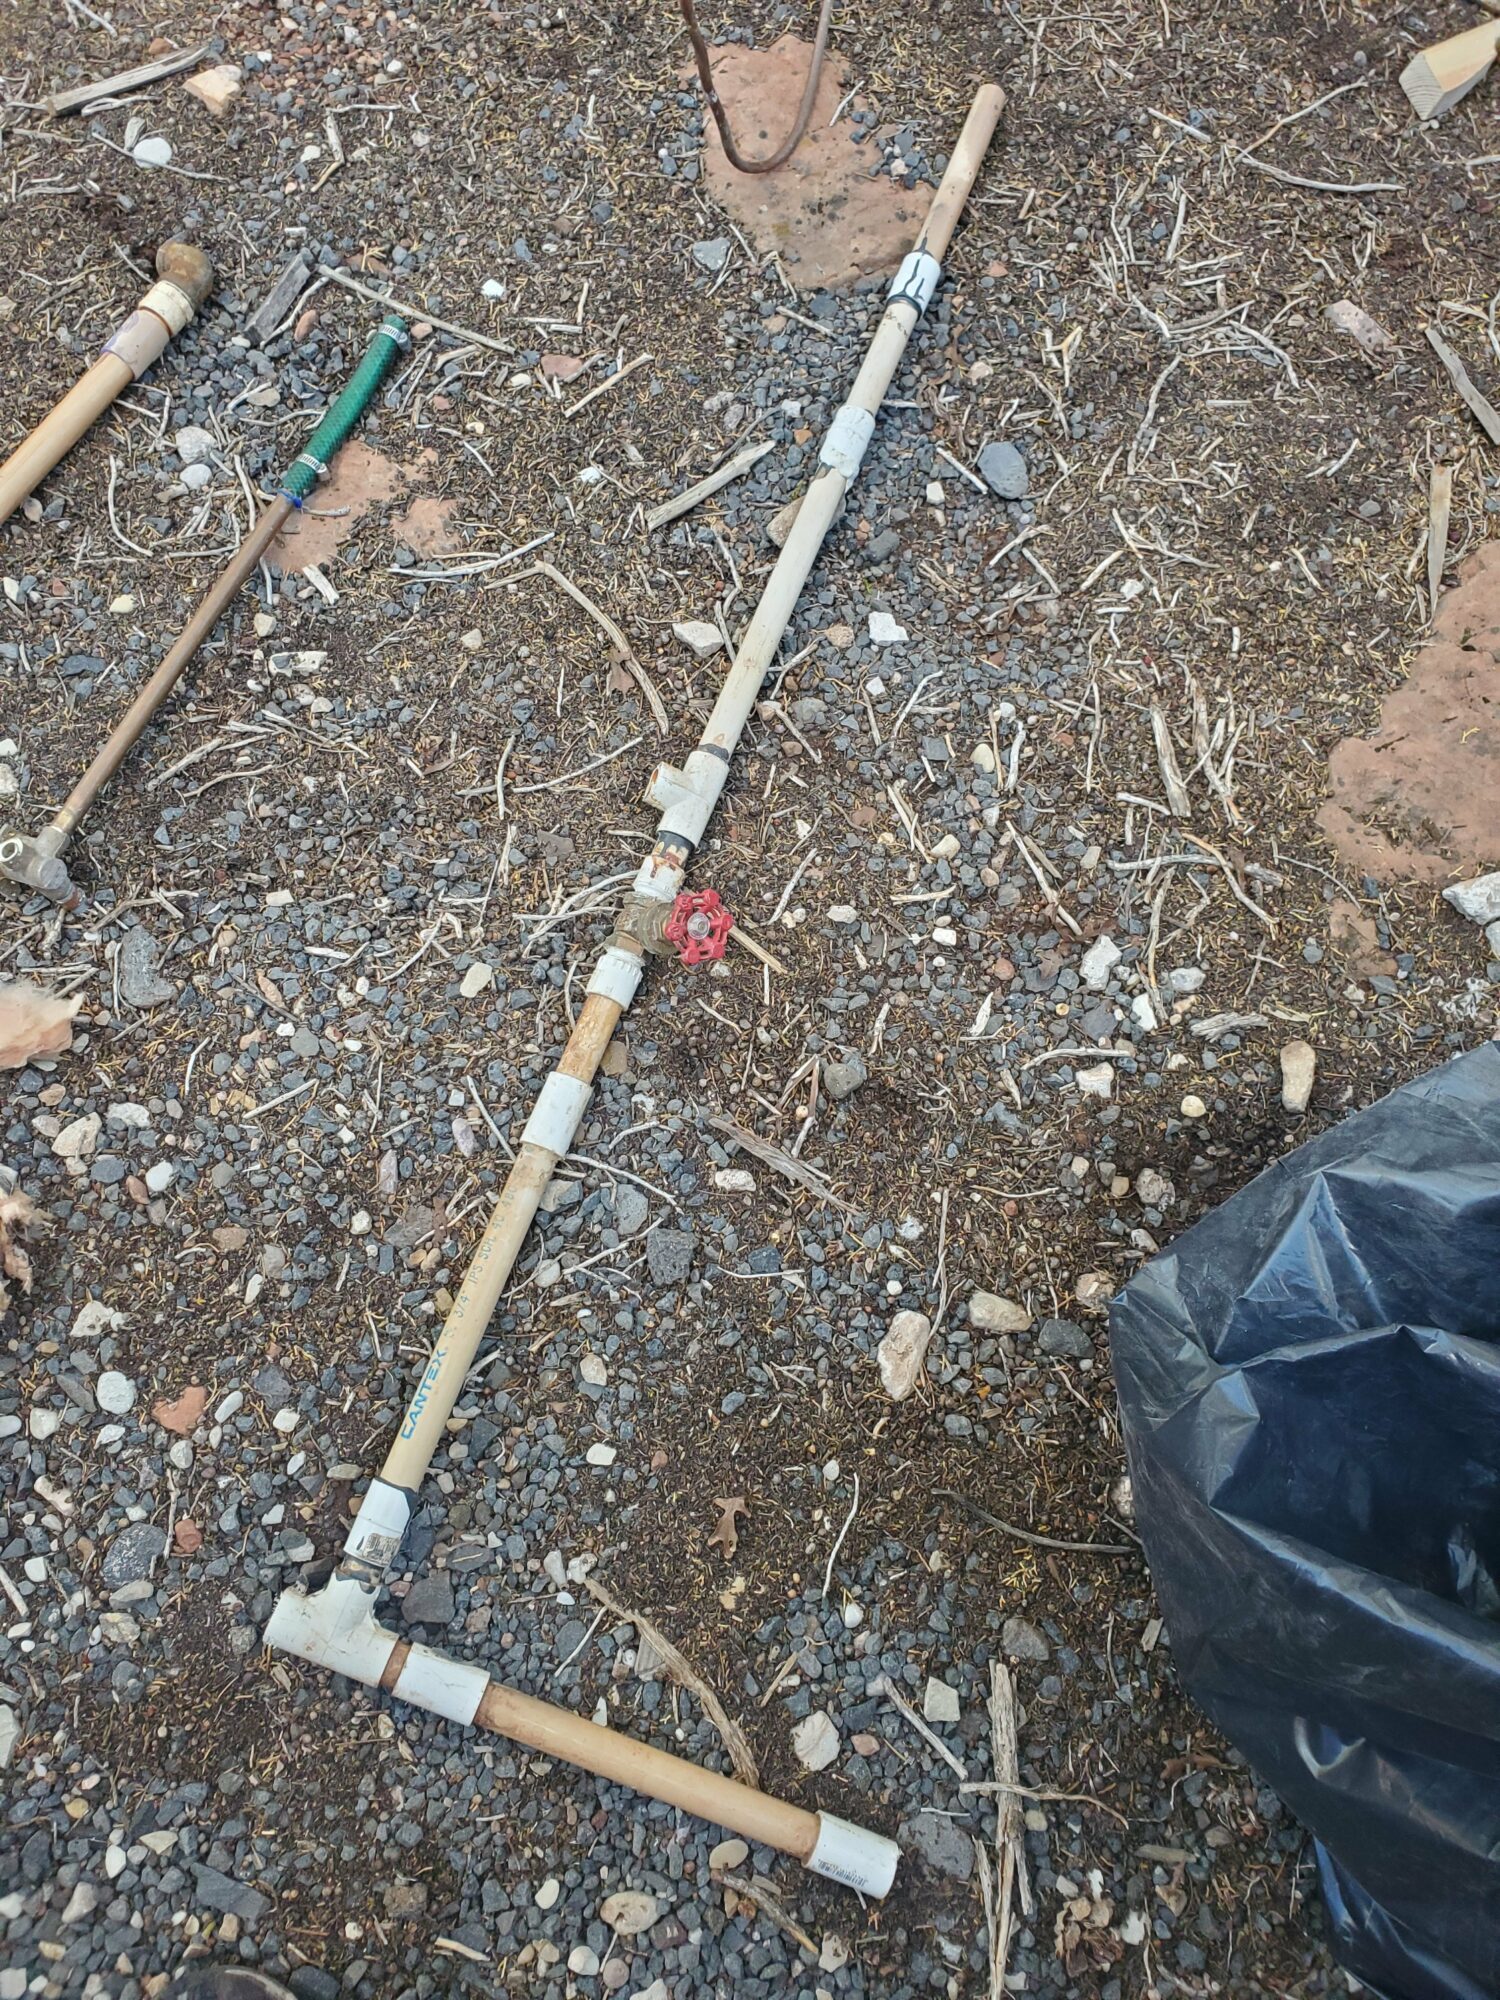
With all the loose crap out of the way, I used a shovel to remove the dirt around the inline pipe. It was only about half buried. Then I cut the insulation off. Again, this was homemade insulation using wall insulation and duct tape. It was wet inside the padding from a small seep further up the bathroom line. Just to give an example of the health of this line, imagine a 5.5′ PVC pipe with 4 straight joints on it.
I grabbed the sawzall and started cutting. Took out 18″ of the mainline and all of the bathroom line. This was my starting point. One water line in and 4 outlets: bathroom hot and cold, and kitchen hot and cold.
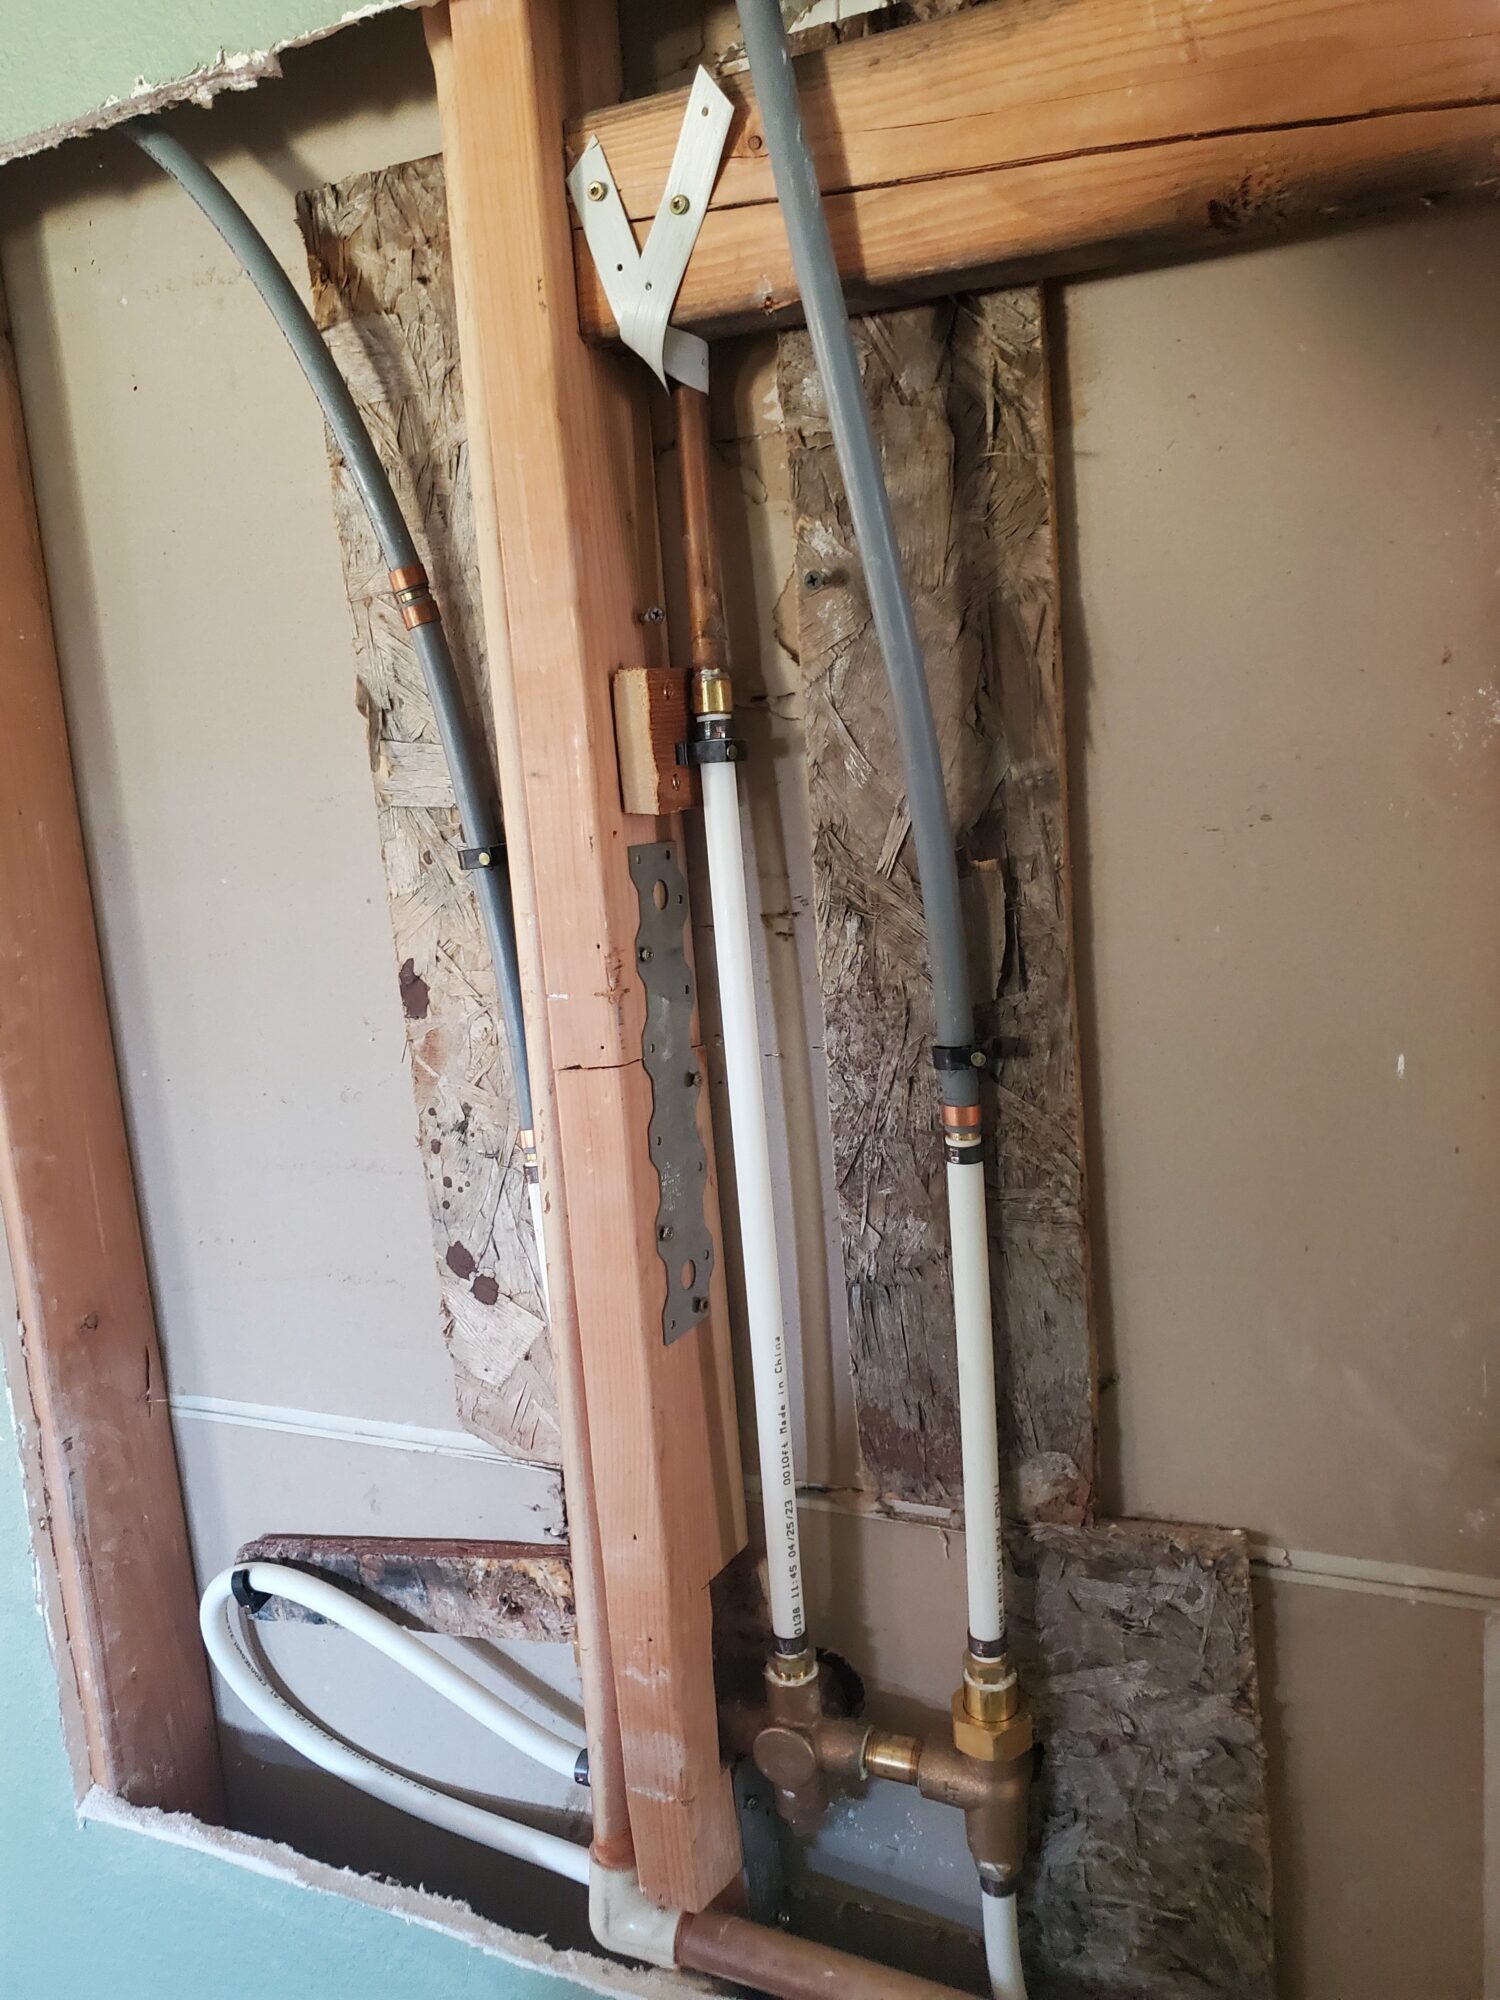
Technically, the kitchen cold supply was just the old mainline, but I replaced the 18″ section with a valve and 2 Tees. The first Tee would be the new main supply, heading up to a small pump. Think motor home pump, but 120v. After that Tee would be the valve. This would be normally shut to divert all the water to the pump, but could be opened to drain the system. Finally, the last Tee would be the input to the kitchen cold supply.
After the pump, the water goes into a manifold with separate valves for the 4 outputs: cold supply to kitchen, cold supply to bath, hot water tank and pressure tank. The idea behind the pressure tank was to help reduce the cycling of the pump. We’ll see if it works.
The hot water tank was easy enough to install. Just 2 screws to secure the mount to the wall and then hang the tank on the wall. My idea here was that for winter, I could just close off the supply and output lines to the tank, disconnect the two hoses and remove the unit from the wall for draining.
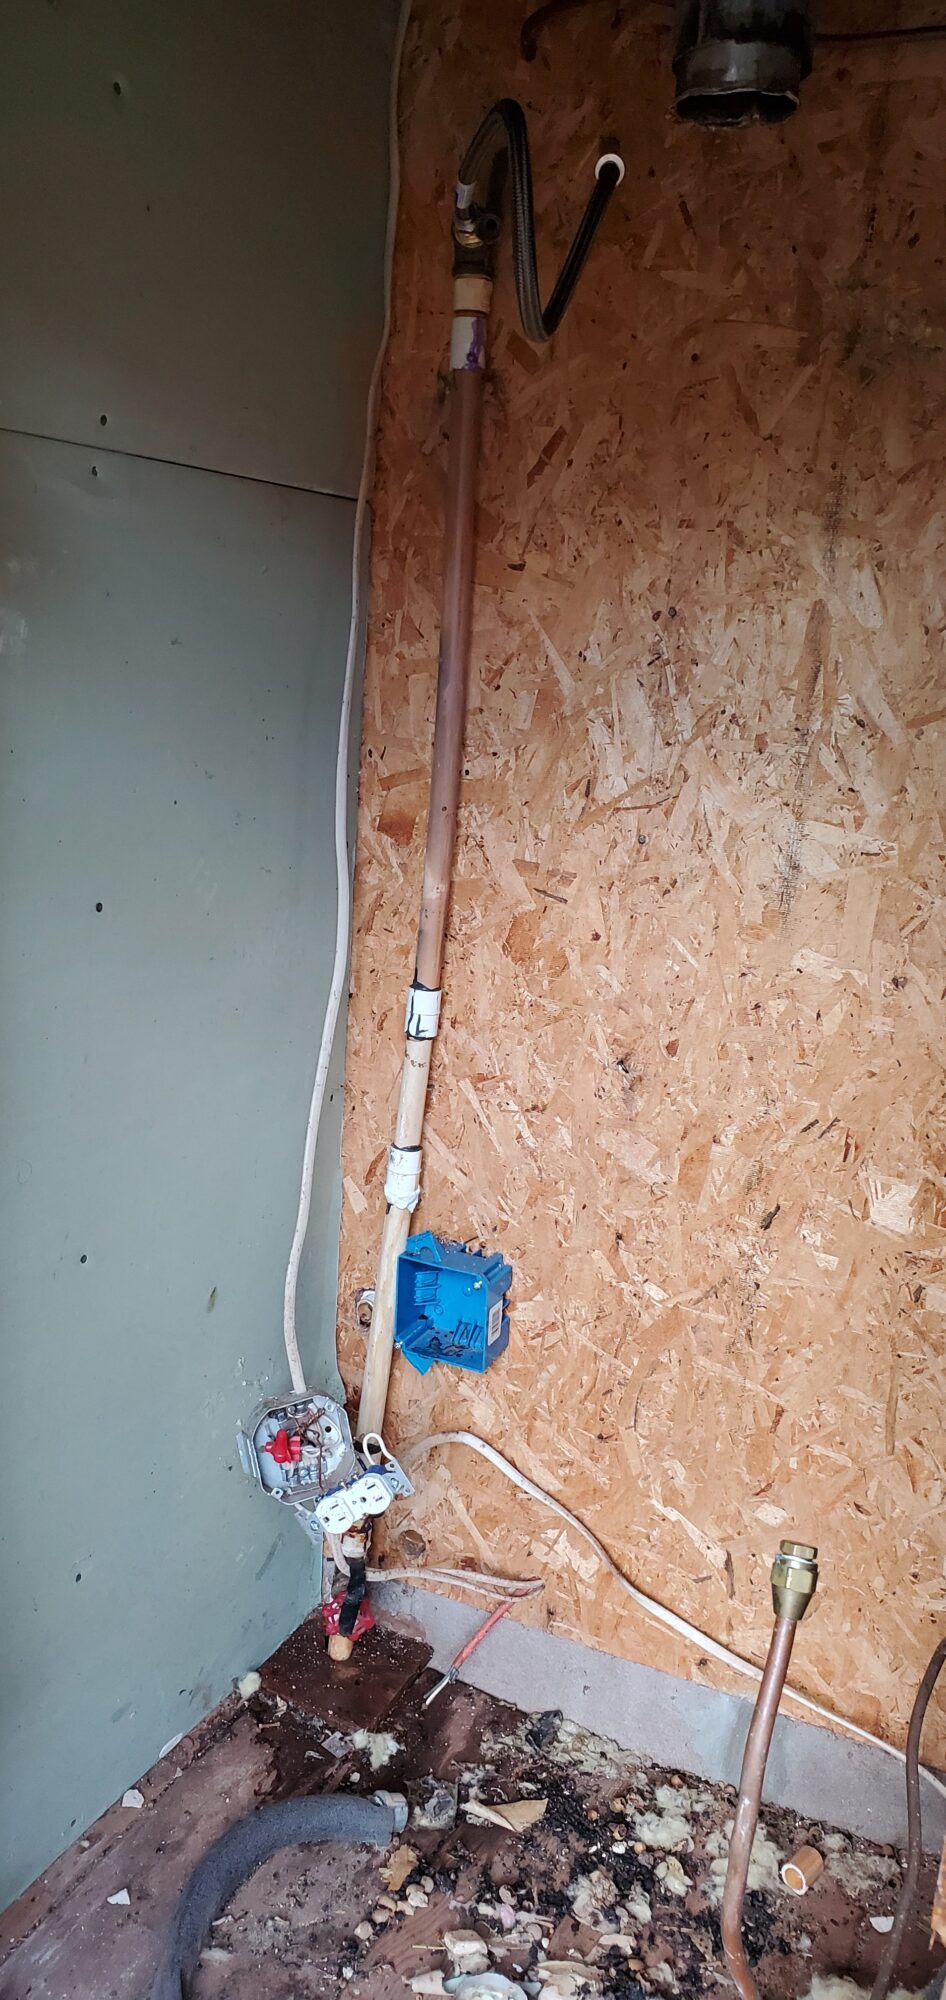
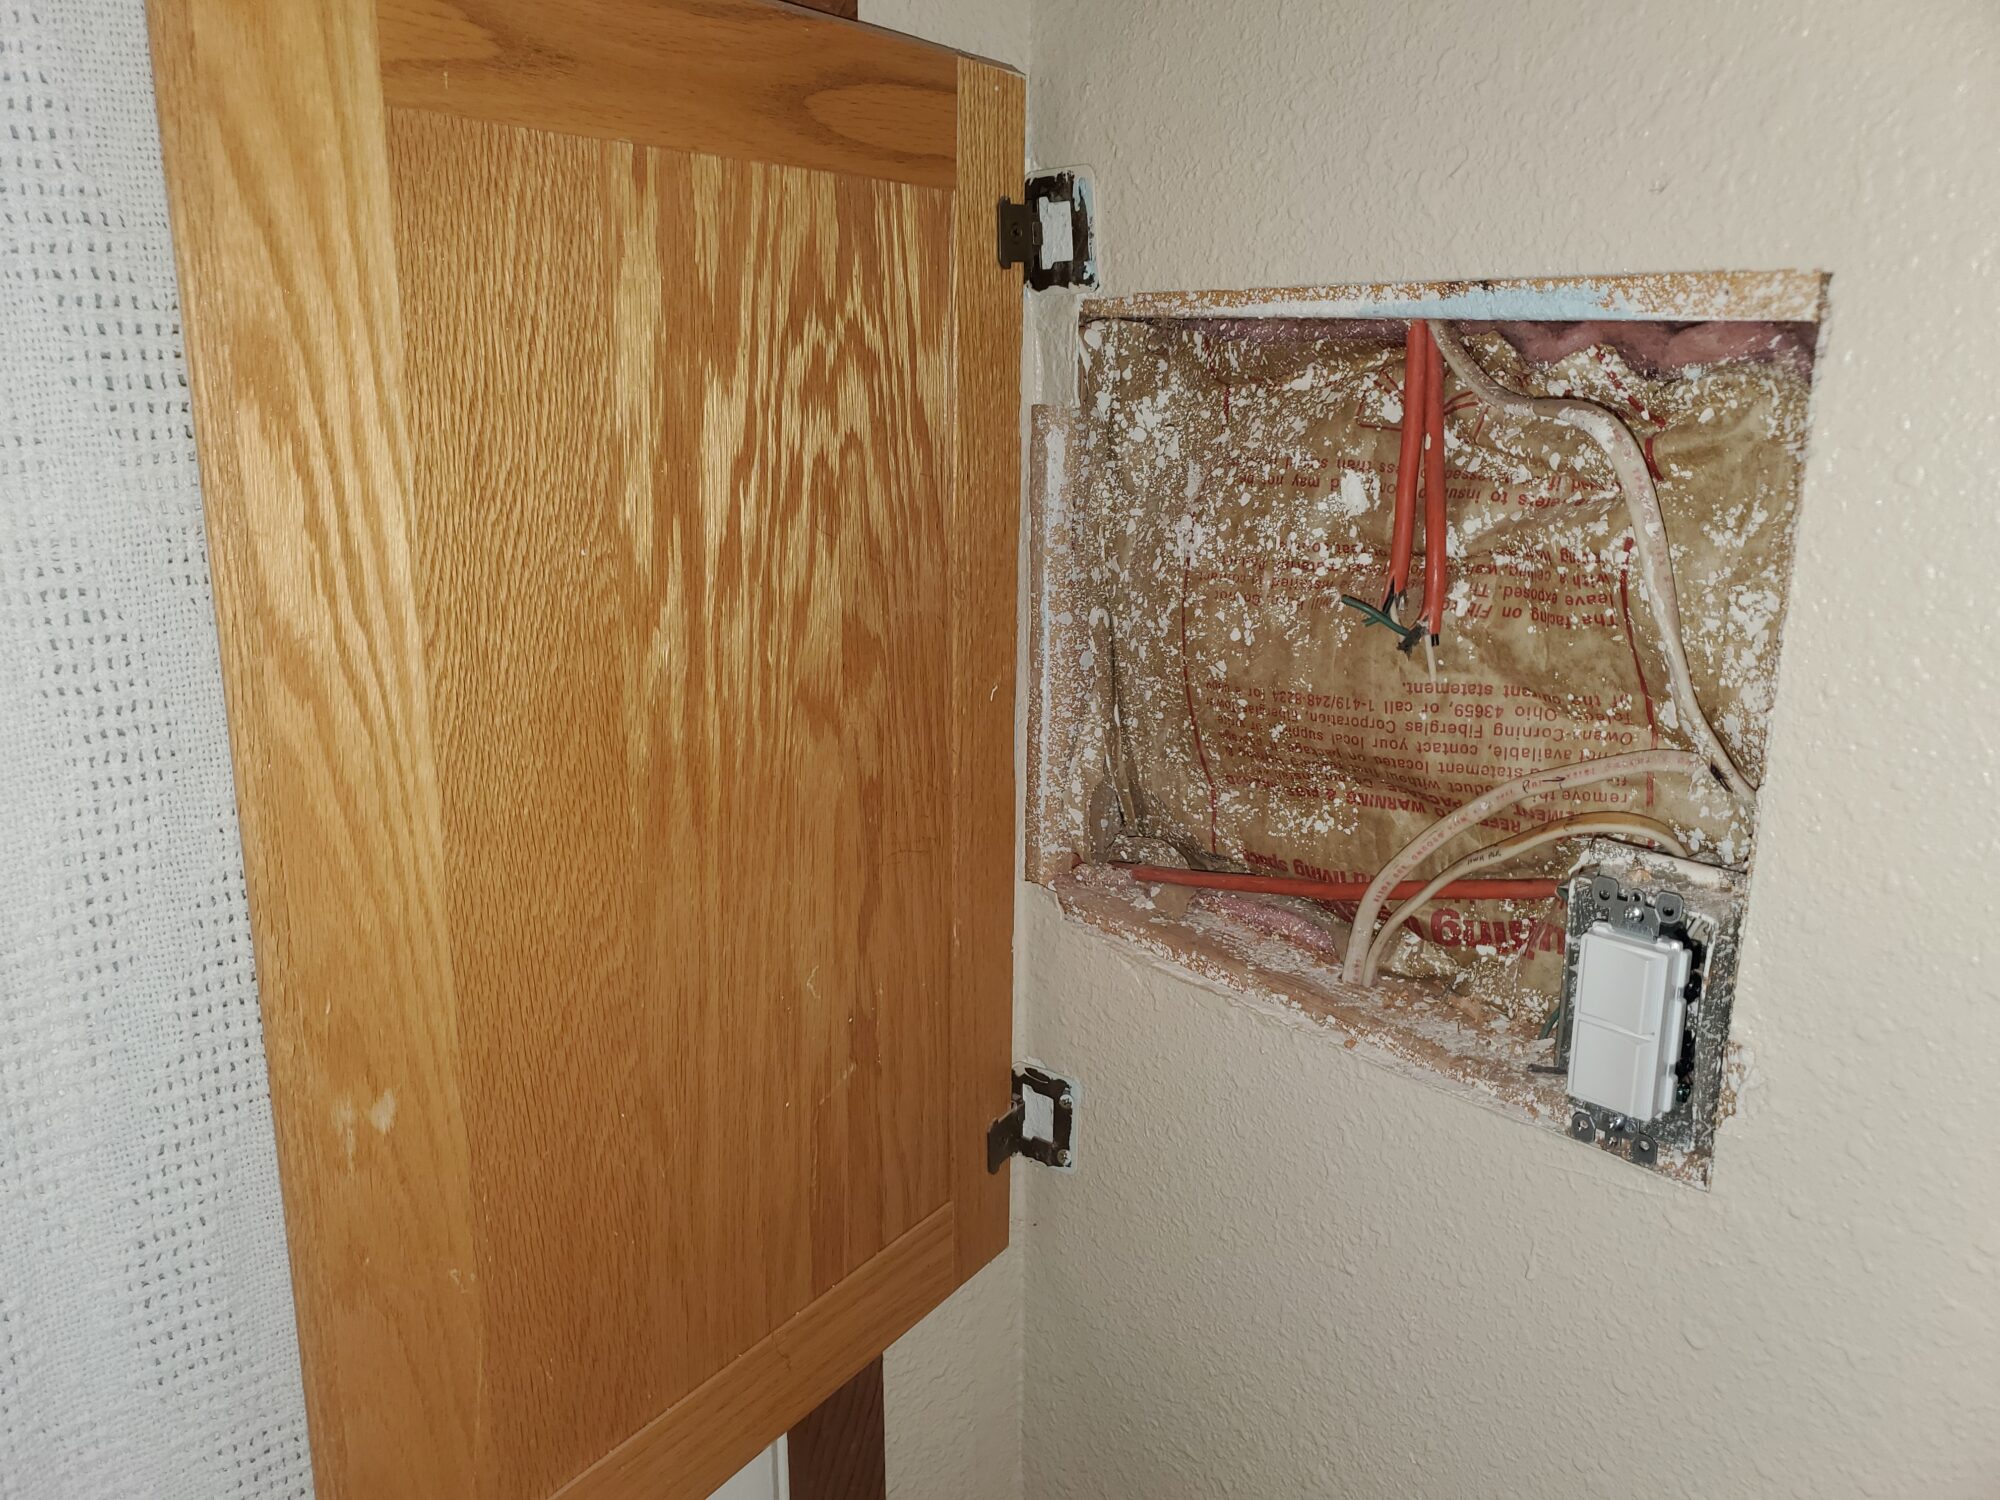
One of the major goals was to be able to control the power to both the pump and the hot water tank from inside the cabin. On this, I was extremely lucky. Inside the bathroom where the water closet is outside, was a single wall outlet behind a wooden cabinet door covering a cutout section of drywall. Ok, whatever. I guess they didn’t want to do drywall repair. But inside the wall cutout was something spectacular. Wiring.
There had been power inside the water closet. But it was a disaster. And open metal gangbox was suspended in the air by wiring, with a single outlet kind of attached to it and all the wiring exposed. 4 romex wires entered this box. Oh, and this open electrical box…just a few inches from the leaky bathroom supply PVC piping.
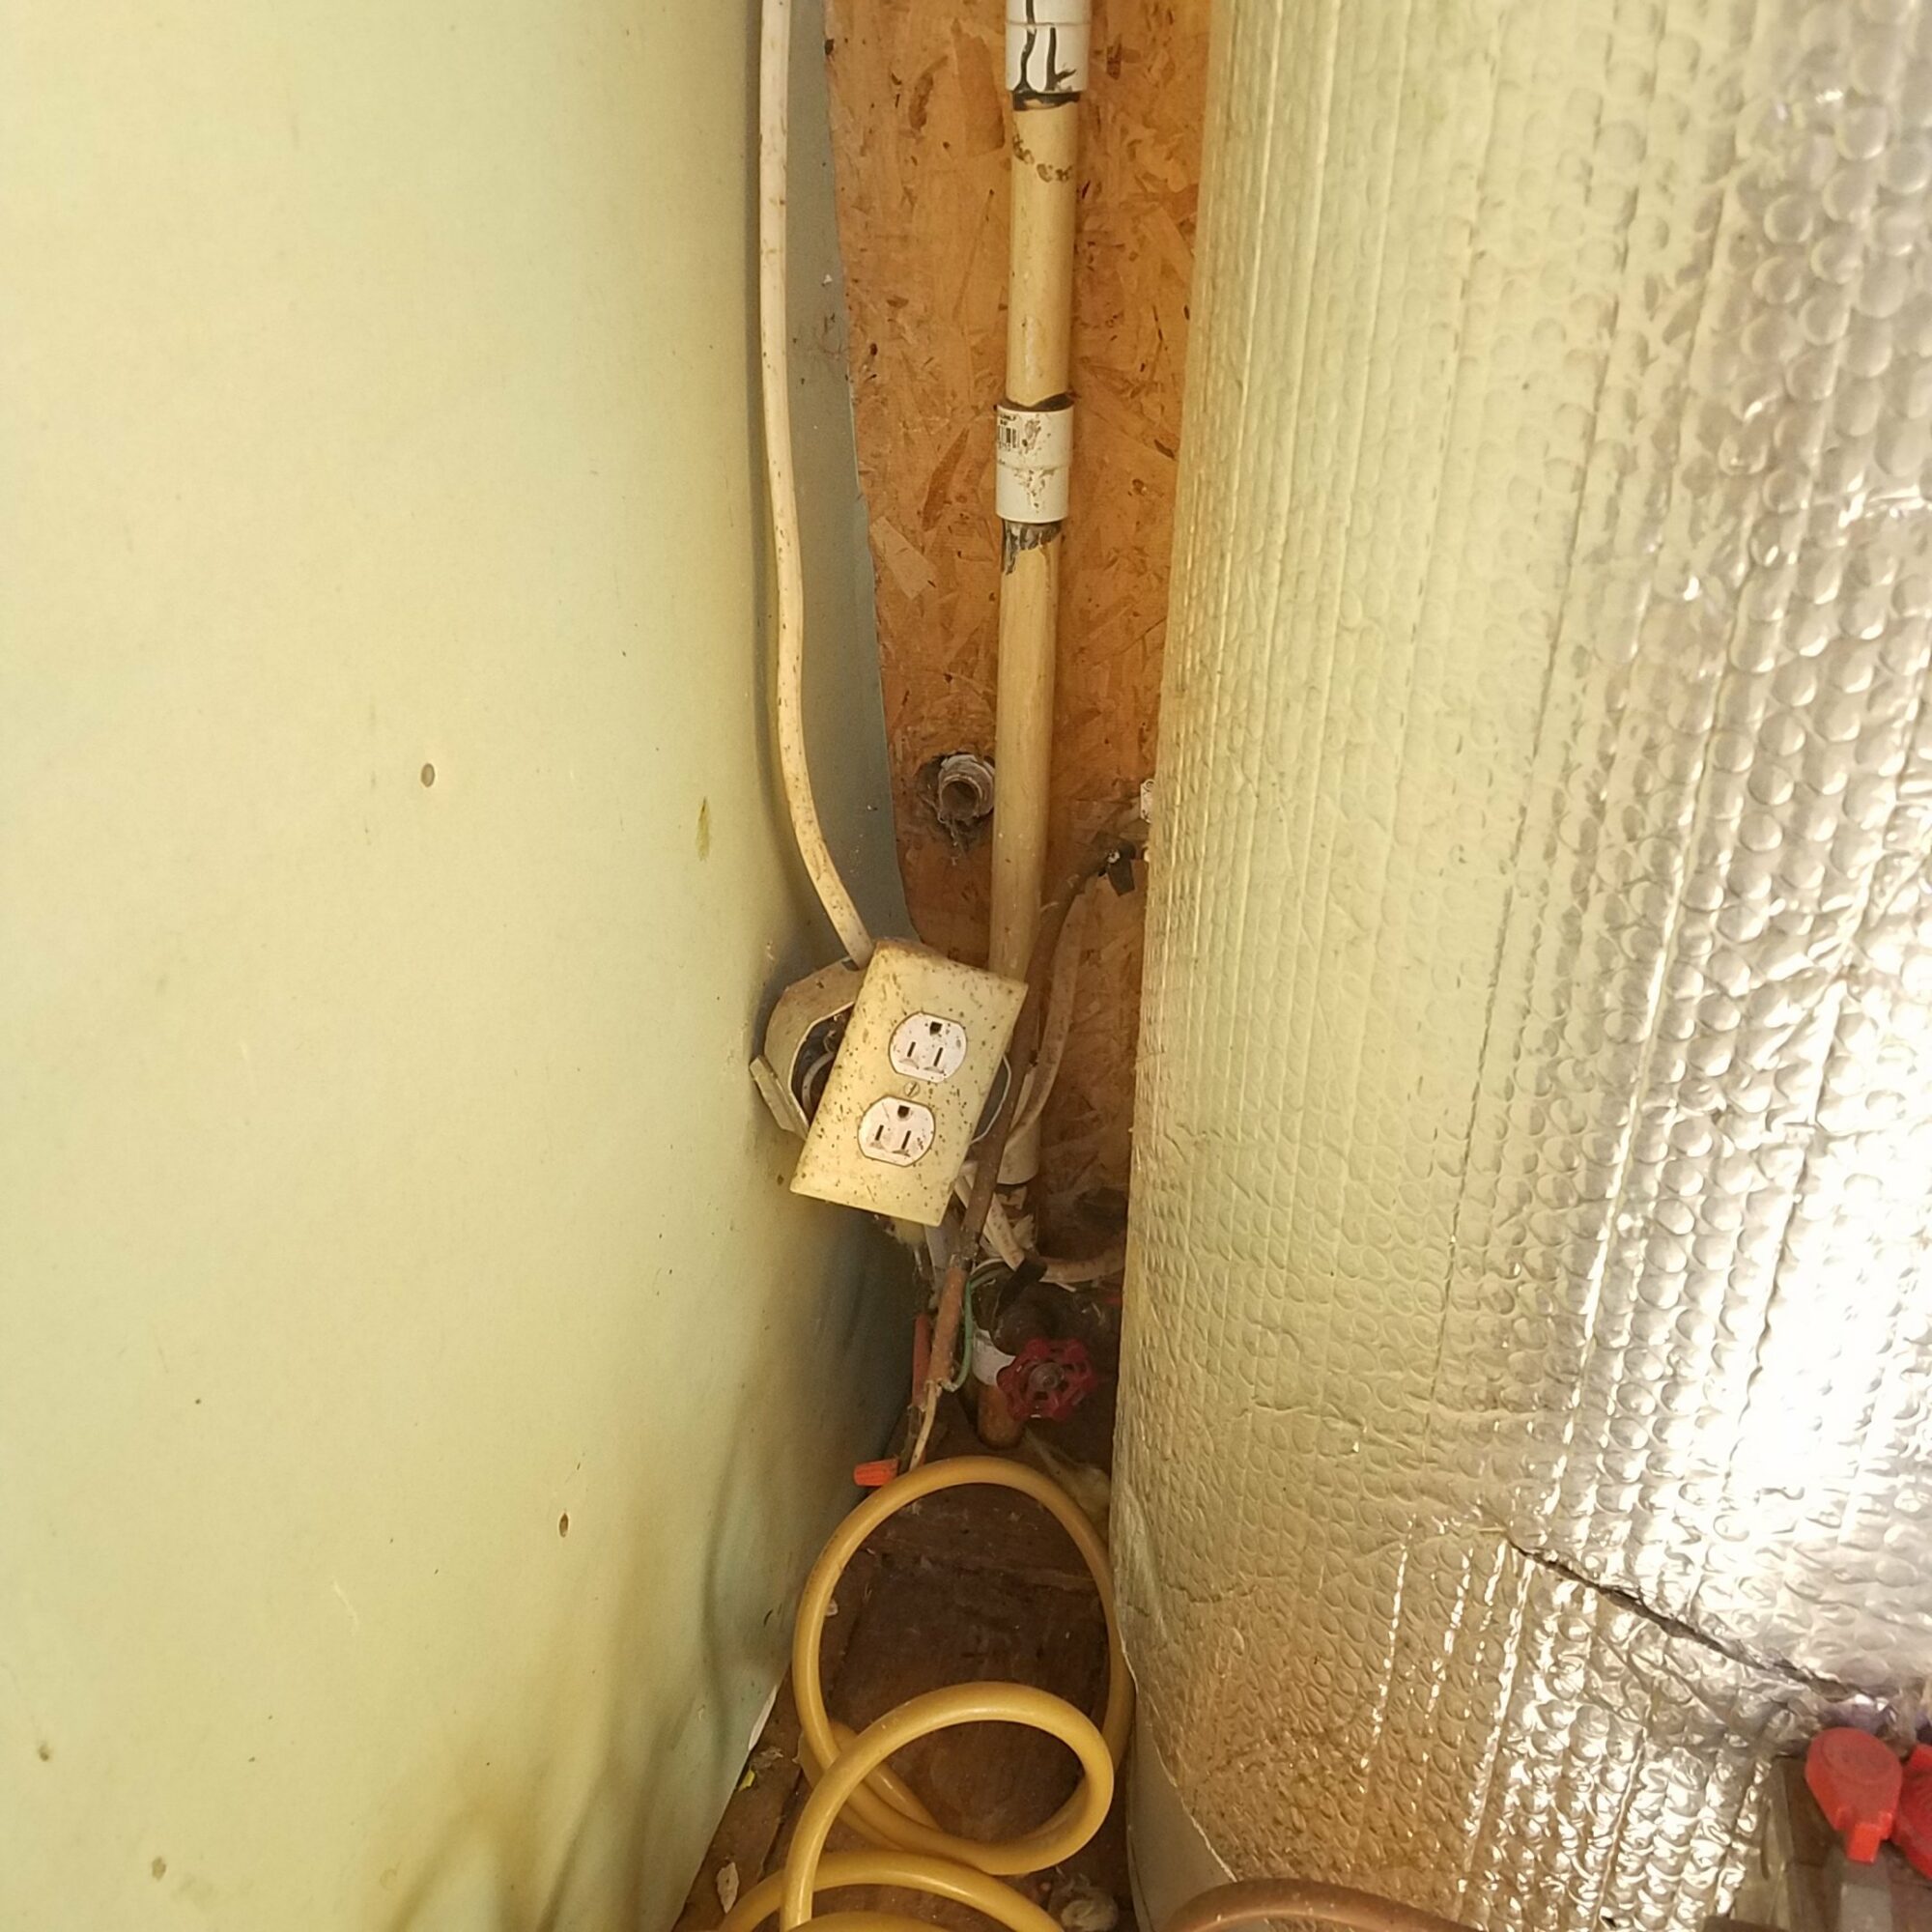
Of the 4 wires, 1 came from the top of the closet, 2 disappeared into the wall into the bathroom and the last went through the side wall, under the entry mini porch and off to supply power to the added-on couch room. This last line was hilariously doomed. Raw romex was run outside, then under the “porch” off to the far side of the cabin, just laying on the dirt. The foot or so length of wire before going under the floor had been chewed on in multiple spots. The one section you can see through the metal grate on the porch was sun bleached and cracked. Totally to code. I don’t usually use that room, so I just disconnected the wire a while ago. I also disconnected the outlet, with the box just acting like a junction box, just totally exposed.
The important part is the 2 wires disappearing into the bathroom wall. Inside the bathroom was 3 wires. 2 from below were the 2 from the closet. One of these went to an outlet, where the 3rd wire was also attached. The other wire from the closet was just dangling with wire nuts, but still live. I have no idea.
Ironically and fortunately, the power line from the ceiling in the closet was the power in. This made life simple. Ceiling power in to an outlet box with two GFCI outlets, one for pump, one for hot water heater. But instead of the hot going to the outlets, I used one of the 2 wall wires to take power into the bathroom and the other wire would bring back the two switched hot lines. All I had to do was replace the outlet inside the bathroom with a 2 toggle switch. And not get the hot and switched wires mixed up.
I still wonder why they installed an outlet 3 feet off the floor, behind a cabinet door. And didn’t finish the drywall. Whatever, weirdos.
So now I had switches inside the bathroom to turn pump and hot water on! Brilliant!
On the first day, I got most of the main plumbing done, with only a couple of missing pieces that I somehow forgot. But I had another task. The shower.
The shower was mainly an issue because it had no pressure, the valve would just spin 360 degrees with no idea where it was and it weeped somewhere inside the wall. So time to investigate.
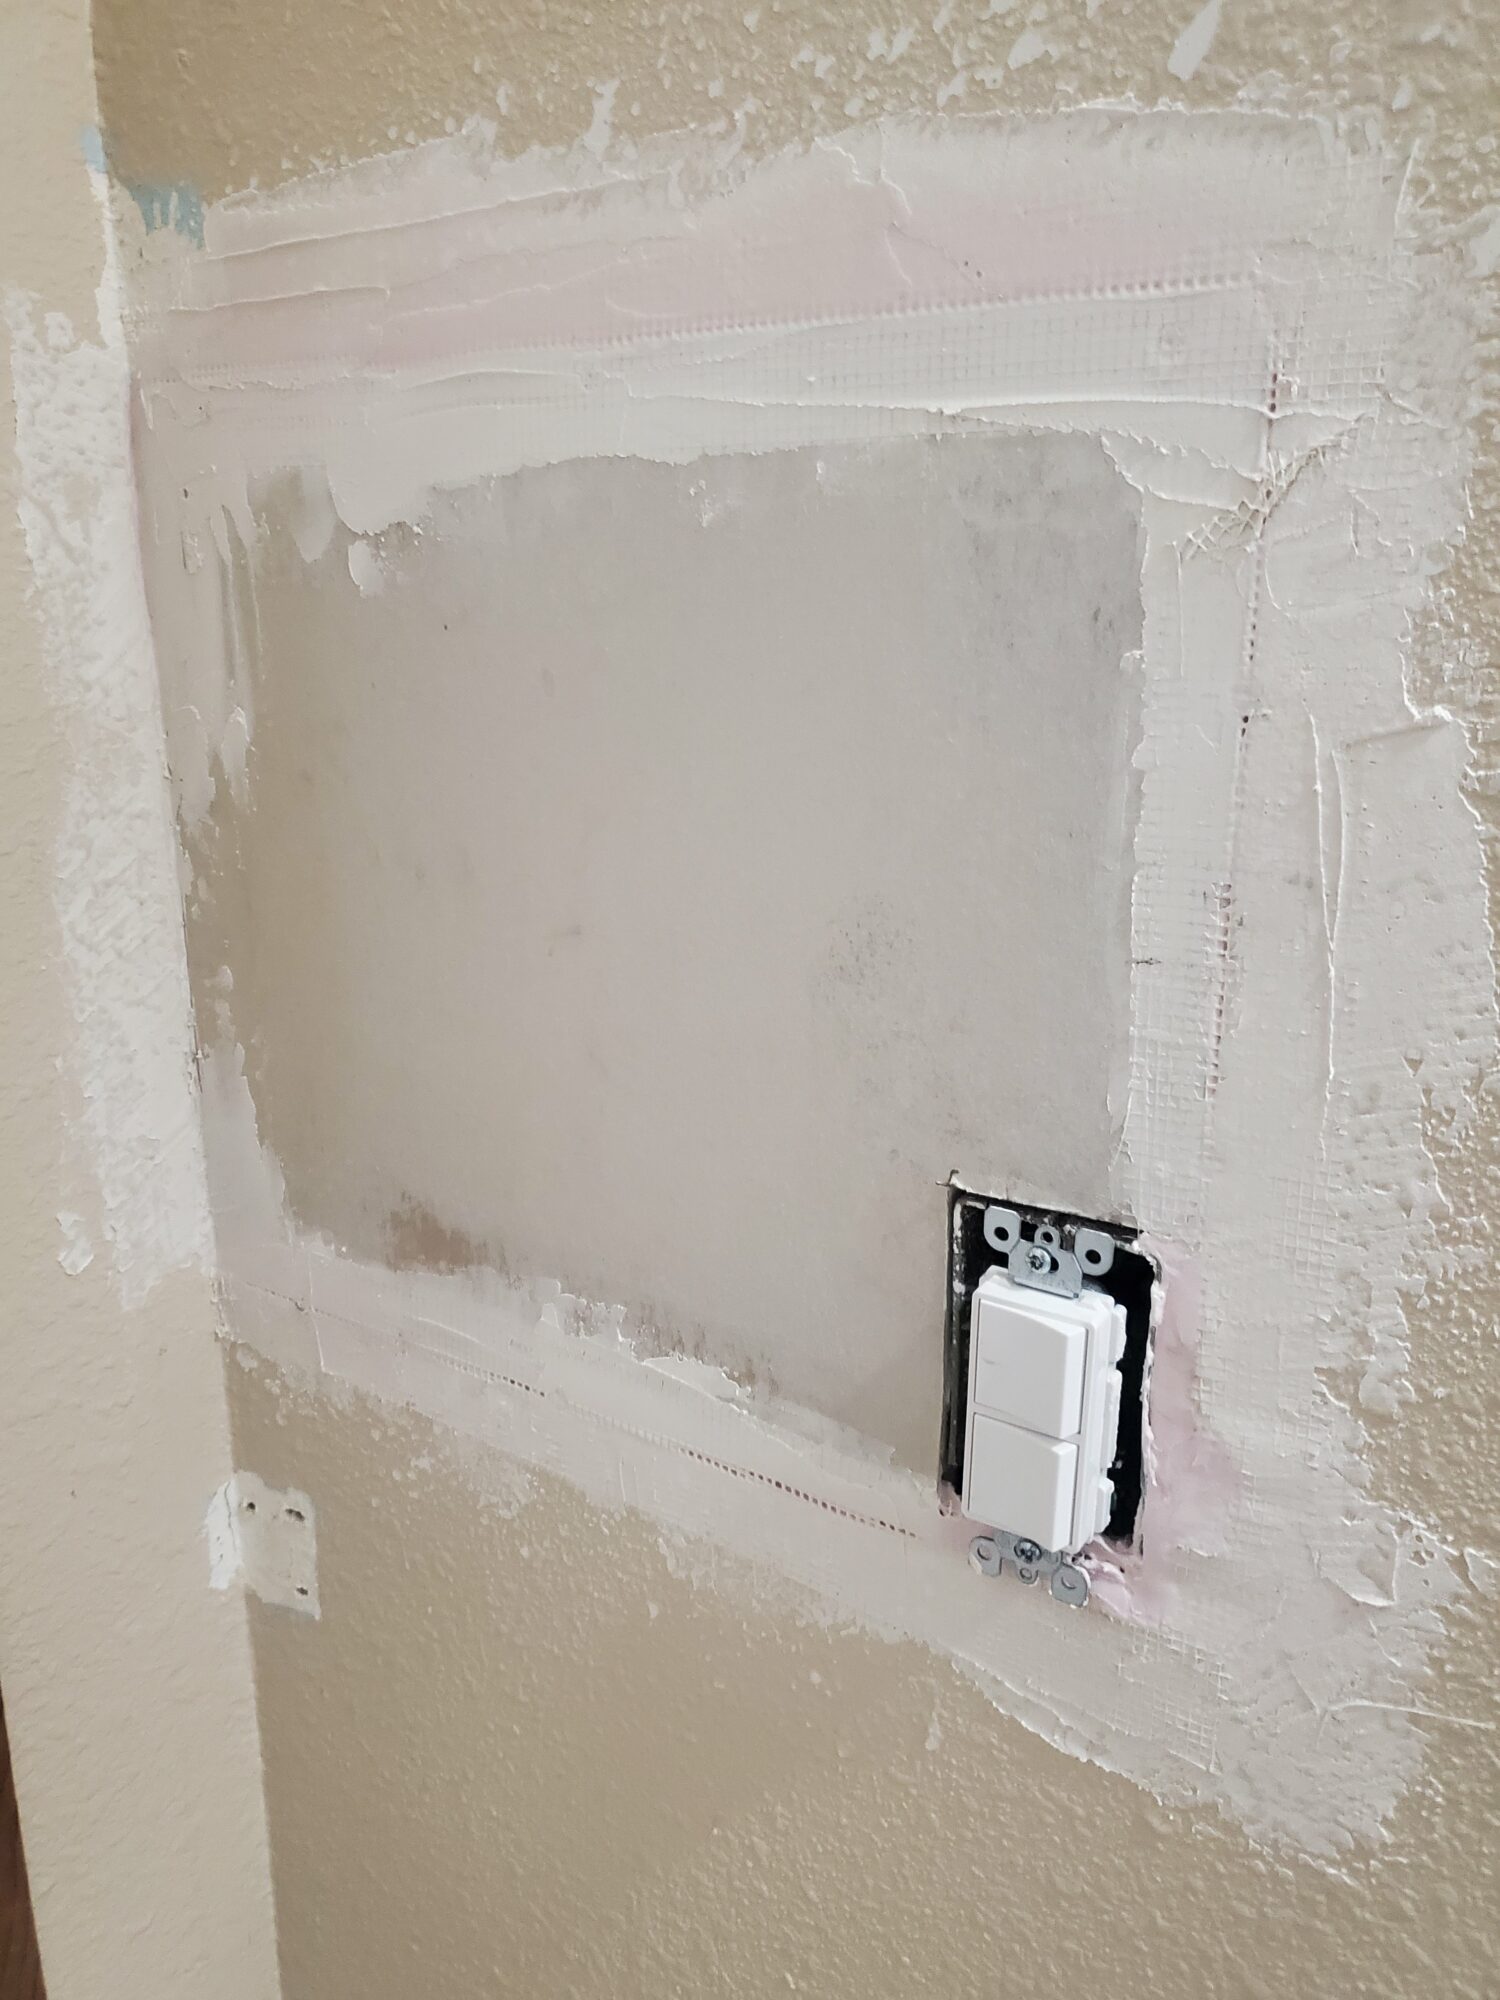
Looking at the wall, I could see where someone had cut open the wall and repaired it at some point. Starting there, I cut a small hole to figure out where things were. Before cutting into the wall, I had thought that maybe I could install a medicine style cabinet with no back, thinking of having a mirror, but open it to access the shower plumbing. This was not going to work. Medicine cabinets sit inside a wall, between two studs. The shower control valve sat 1″ from a stud. I needed a better look, so I cut a 30″x36″ piece of drywall out. This way I could secure the edges of the drywall patch to the existing studs and give me access to all the shower plumbing.
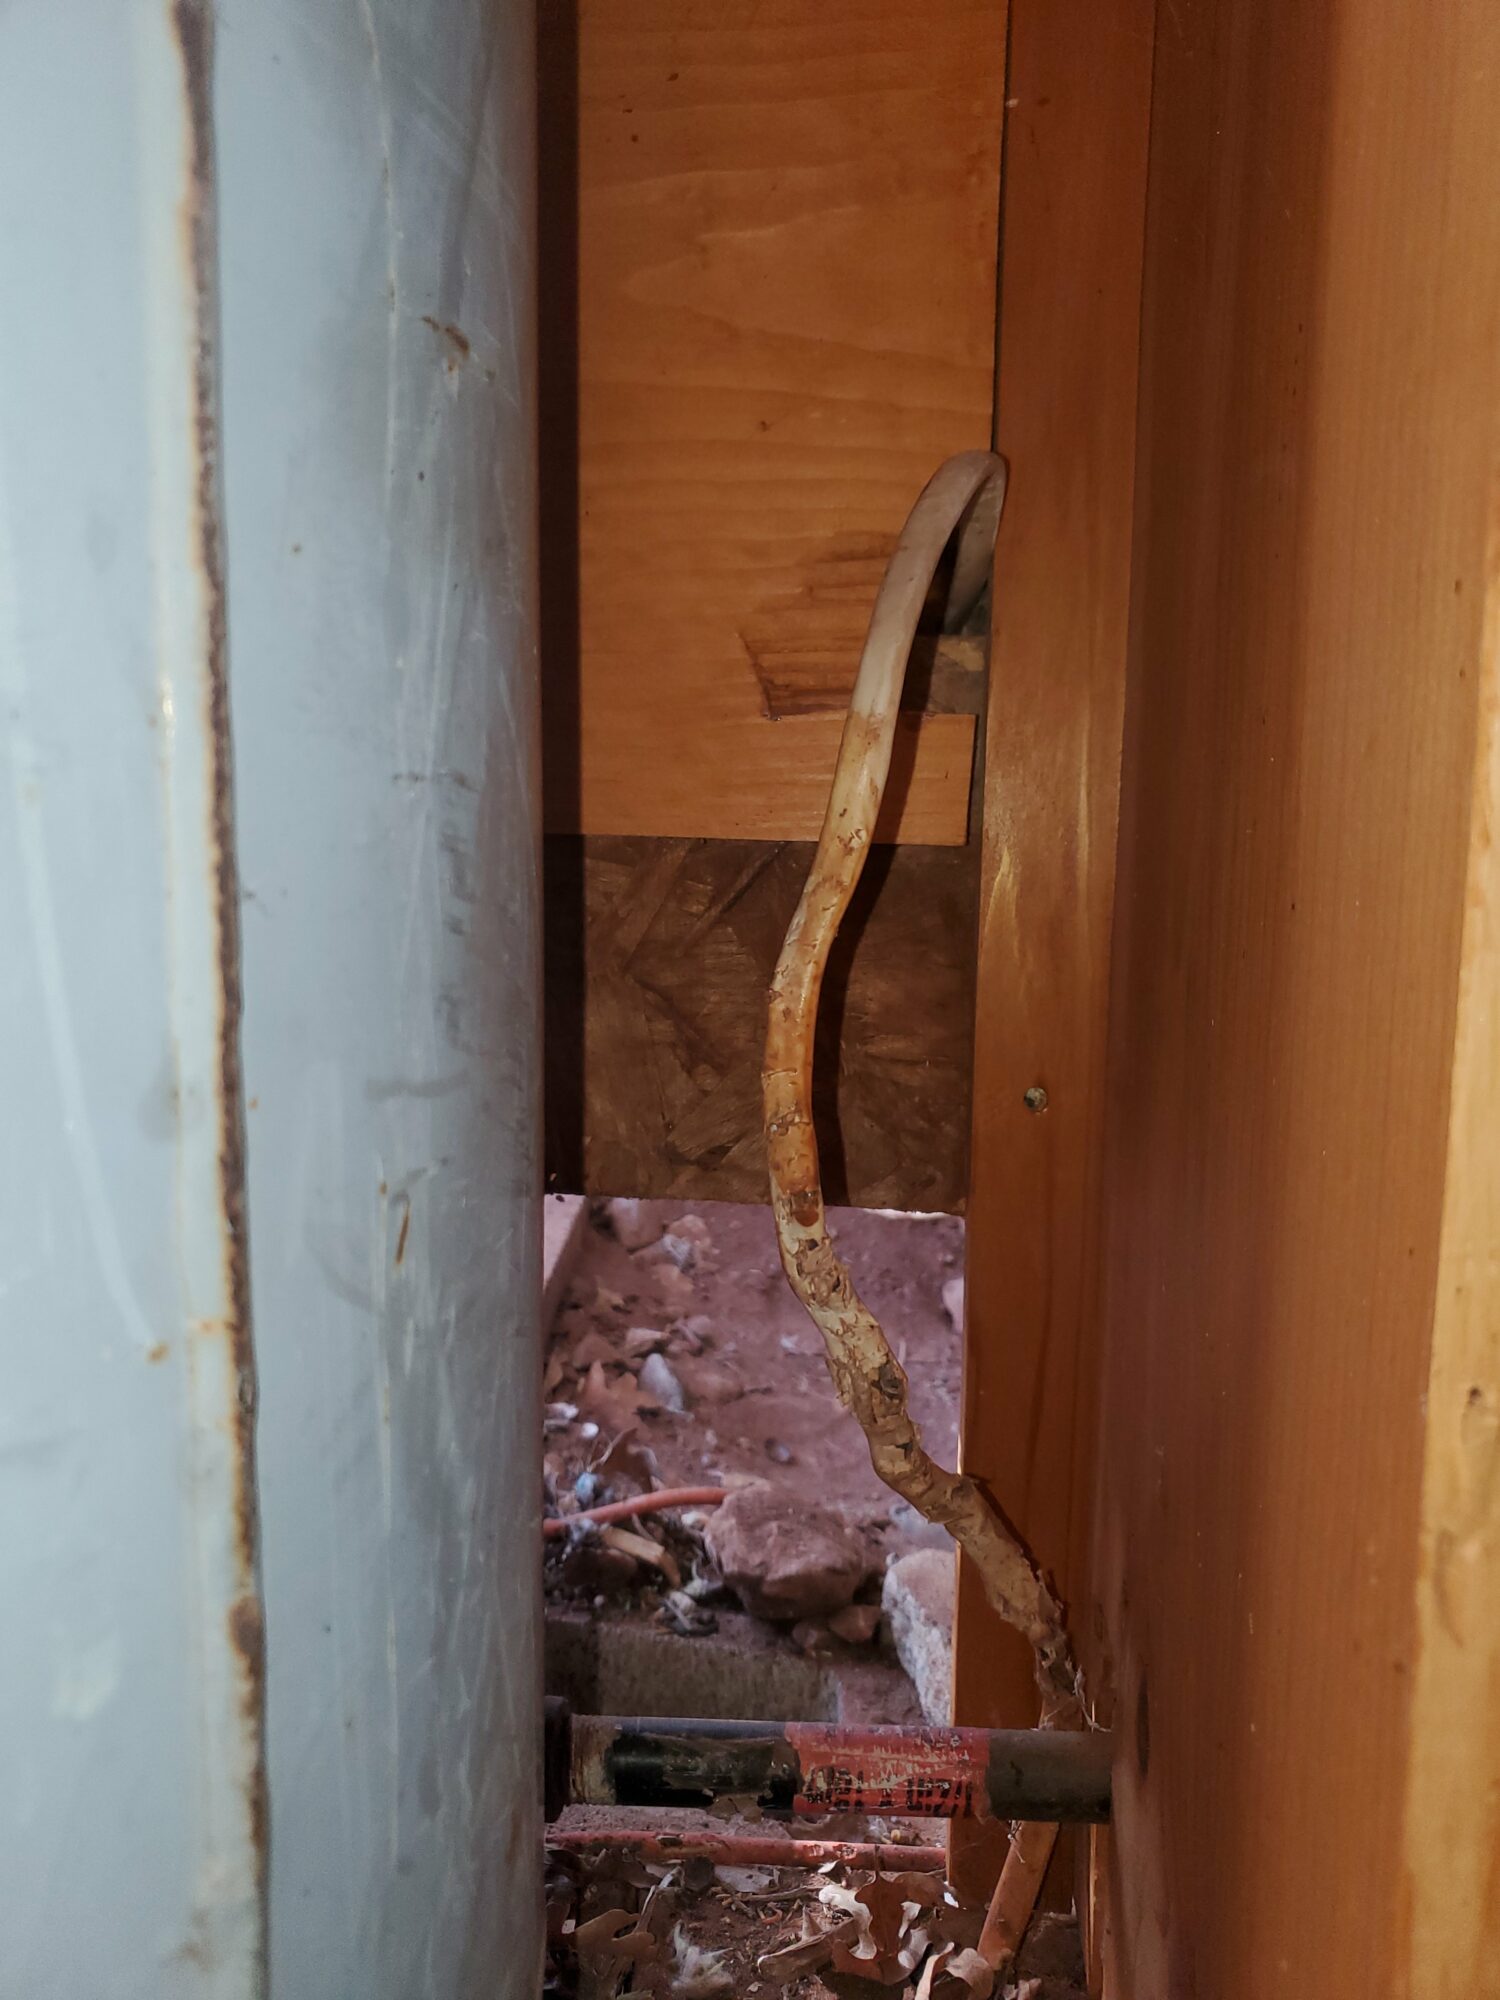
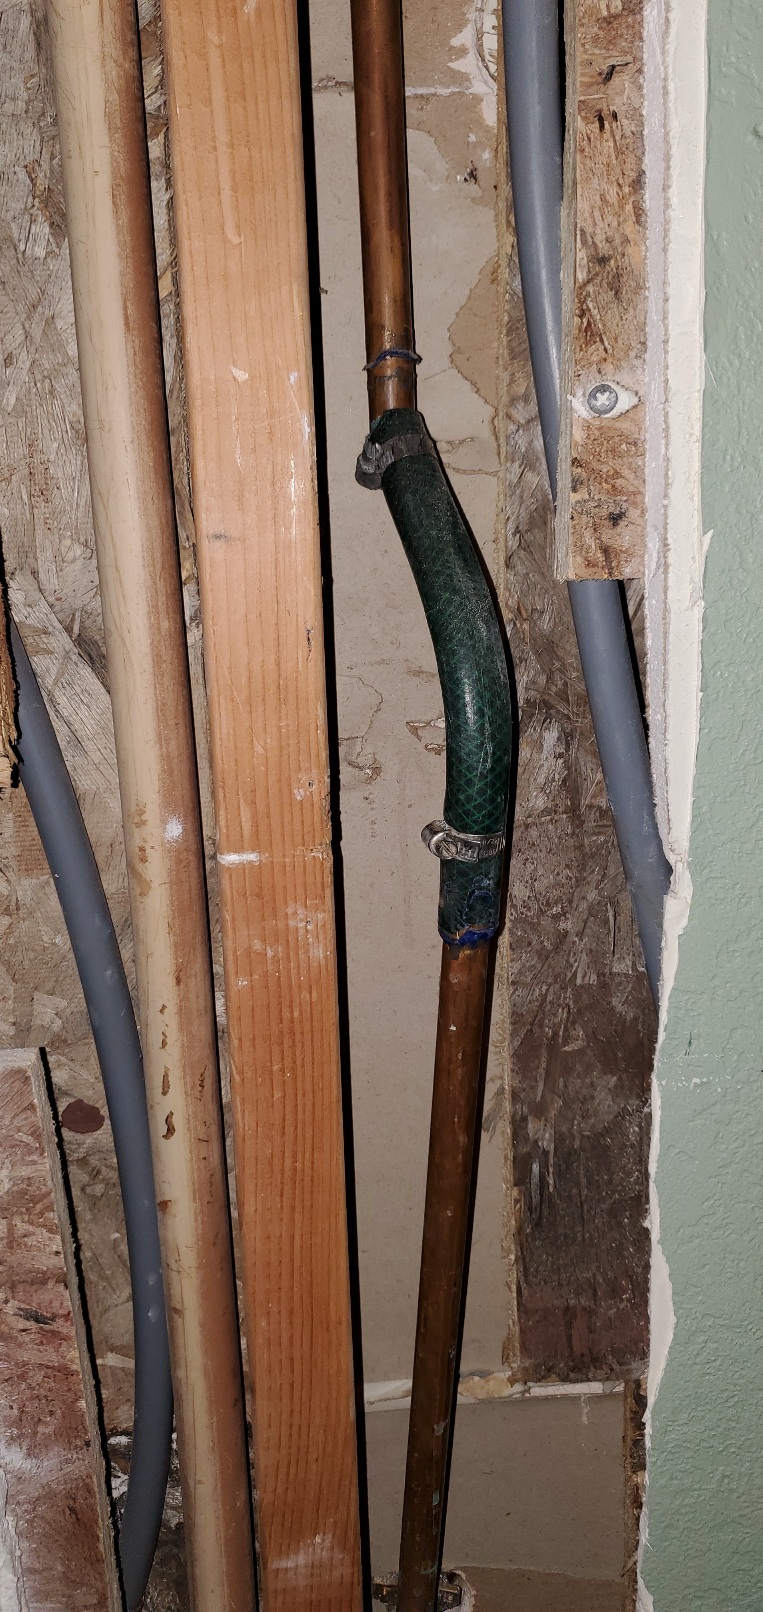
The first major wtf moment was the shower head piping. Usually, it is a solid piece of copper tubing connecting the control valve to the shower head elbow. Imagine that, but with a piece of cheap garden hose replacing about 6″ in the middle. Oh, and the upper part of the hose had slid down so that the ends just sort of touched. I’m honestly surprised that any water at all came out the shower head.
The second big issue was just removing the old valve. Usually, the control valve would be mounted on a board that spanned two studs. I had my sawzall ready. But no, that’s not how it was mounted. Instead, one side of the valve, the cold water supply, went through a small hole in the stud. That was it. At least it explained why the shower knob flopped around while turning it.
This complicated the removal because even with the valve completely gutted and the PB lines cut, I couldn’t remove the valve from the wall or the stud. There was only 1 way…sawzall. i mean, i had it ready. Cut the cold supply nipple off and pulled the two pieces out.
This also complicated the install, because the stud was right where the new three handled valve would sit. I wanted a 3 handle valve so that you could open a single valve without worrying about the mixer backfeeding the hot with cold water. Something I learned from the kitchen sink. This stud issue was also solved with the sawzall. I cut about a foot of length out of the stud. I doubt it’s load bearing. (Don’t worry, I’ll fix it later.)
This would have made the control valve really easy to install…if it weren’t for this random PVC pipe that was routed right through the project. To be honest, I have no idea what the PVC pipe is for. It comes in from behind the shower (along with the supply lines for the toilet and sink), heads into the top of the wall and then another pipe returns 6 inches to the right and goes through the wall above the shower head. I have zero ideas.
I was able to bench install all but one brass PEX fittings to the rough valve before sticking it through the wall, prying the PVC pipe as far as it would go. Then just secure last brass fitting and start crimping PEX lines on. Why didn’t I just plumb straight from the brass fittings to the PB hoses? Because I couldn’t find any PB copper clamps, except those that came in the PEX to PB joint kits. Just doubling the amount of crimped connectors. What could possibly go wrong?
I installed the handles which helped to hold the valve in place. I modified the piece of stud I had removed to allow space for the new valve and reinstalled it with metal plates. Necessary? Probably not, but I don’t really want to chance it.
The final piece to connect was the shower head line. I pulled out the copper to PEX fitting, grabbed the solder and flux, mounted the fireproof cloth so I wouldn’t set the stud on fire, and prepped the propane torch. And then I opened the flux to see crusty chucks. Totally dried out. What? It was only over 10 years old. Probably more like 20.
It said it was water soluable, so I added a tiny bit of water and tried to bring it back to life. Yeah, that wasn’t happening. I gave it a try though. It was probably mostly water, but 0% of the solder got into the joint. Well fuck. Add it to the list of shit needed.
Since it was late on the second day, I decided I wanted to pressure test the system instead of going to town. As long as I made sure to keep the shower knobs turned off, I should be fine. I walked up the hill and opened the valve leaving the tank.
Initially, I left all the valves closed. I listened for water trickling through the pipes. Nothing. I decided to open the main line drain valve which also would feed the kitchen and turned the sink on. At least now I could hear air blowing through the pipe. Eventually, a thin drizzle came out. I impatiently did not wait, shut off the sink and returned to the water closet where I closed the drain valve. I could hear gurgling, so I opened the valve that would eventually go to a pressure tank, but was now just open.
Water bubbled and then spat out. Closed the valve and opened the kitchen circuit and back to the kitchen sink. While sounding like your guts after gas station sushi, eventually water burped out and ran. Albeit slowly.
Next was to turn on the bathroom circuit. This is when I noticed a few leaks in the system already. The inlet to the pump. The inlet to the manifold. One manifold outlet. And one valve inlet. Well, nothing a little extra pressure with the PEX crimp tool can’t fix.
Initially, I used the PEX crimp tool I had used in Ohio on the big garage bathroom. It was a two piece 6″ chunk of metal that loosely fit around the collar. You had to use a wrench of some sort to compress the tool. It took a lot of effort. Honestly, I just gave the wrench as much force as I could and hoped for the best.
But then during day 2’s excursion to Home Depot, I eyed up a new tool. Was it more than I wanted to pay for a cheap Chinese tool? Yes. Was it worth the cost to not worry about the shower plumbing crimps dripping into the wall? Yes.
But even the fancy long handled tool took some finesse. The first test piece was over crimped. Check the adjustment and it looks to be halfway between 0 and 1. Adjust it one notch and it goes to minus 0.5. Whatever. Test 2 at full cam is also over crimped. For test 3, I stop just before the handles cam together. Turns out perfect. Sure. Why not?
So, I use the new tool to recrimp the leaking joints. What’s funny (to me, at least) is that when you recrimp, it probably isn’t the same direction as the first crimp. So it takes the ring and reshapes it…causing water to spray everywhere during the reshaping. But it works. Free shower!
Now I can turn on the bathroom circuit. Oh, and the hot water tank too. Basically, the whole system. Since recrimping sprayed water everywhere, I decide to grab a towel and dry it all up, so I can see the new leaks. The next couple of hours is finding, crimping and drying leaks. Almost every crimp I made with the old tool. Shut up.
I had noticed water at the very bottom at the main line PVC to water closed Tee. I was hoping it was just all the other leaks draining down. But no. It was weeping. Unfortunately, not the PEX crimp, but the brass adaptor to PVC. I cautiously put my big wrench on it and turned while holding the mainline from moving. On the second attempt, it stopped leaking. I was afraid of snapping the old brittle mainline pieces I had not replaced.
With all the leaks hopefully fixed, I flipped the switch on the pump. It ran for a short while and then stopped when it reached pressure. I turned on a faucet and it turned on again. It all worked. I’m as amazed as you are.
I turned the pump switch off and left the system to pressure test for the night.
In the morning, I noticed only 1 small leak that needed additional crimping. Then it was off to home and the store for new flux, copper solder, and all the stuff needed for drywall. Drywall. My favorite. But luck had shined on me with 2 pieces of random drywall scraps in the shed being slightly larger than I needed. At least I didn’t have to buy an entire new sheet.
I returned and sweated on the copper to PEX fitting for the shower head. Amazing what good flux and solder will do. While waiting for it to cool, I inspected all the water lines. No drips! I also made measurements for the drywall patches and cleaned up all the debris I had been creating.
Once the fitting was cool enough to touch, I crimped on the final piece of PEX, said a small prayer to the plumbing gods, and turned on the shower valves. Water came out the shower head tube and not inside the wall! Then I attached a temporary valve to where the shower head would go and pressurized the system with the pump. It survived 2 hours with leaking, so I called it good and installed the final showerhead.
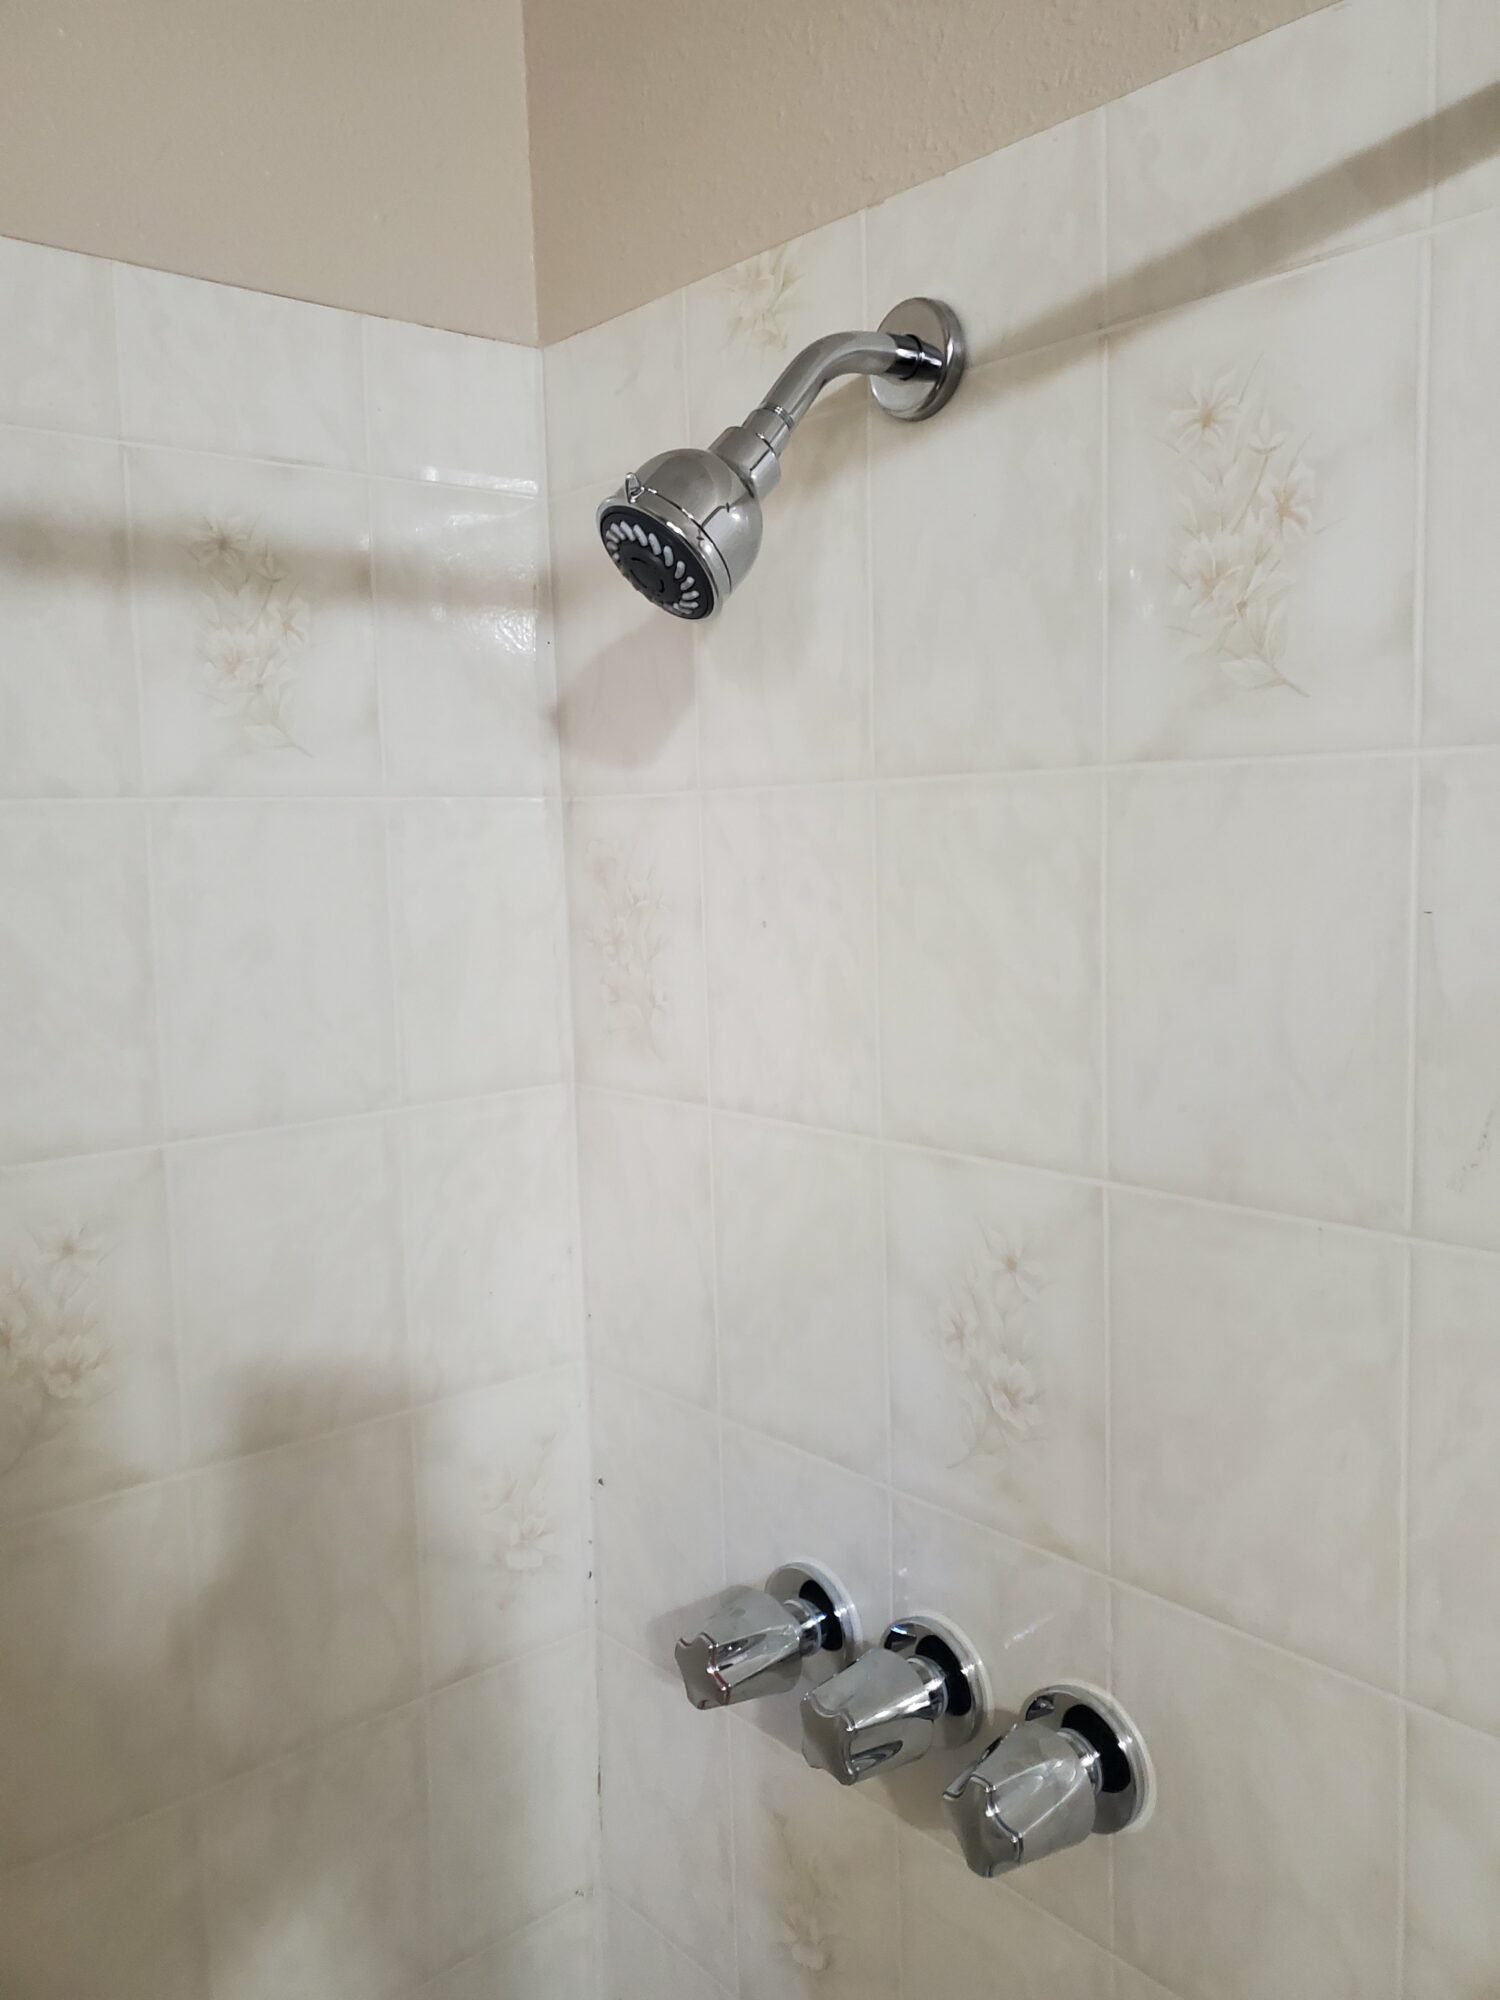
Now one thing I didn’t install was the tub faucet. Why do you ask? I couldn’t. For some reason, they built the wall with a horizontal 2×4, a false footer, at the same height as where the tub faucet piping should go. Yep. Just in the perfectly wrong spot. Fuck it. Who needs a tub? Not enough water at the cabin for a soak anyway.
Time to make some dust. Cut the drywall to fit and take it in. They fit…with a little adjustment. The holes weren’t exactly square.
Then tape and mud. Fun stuff.
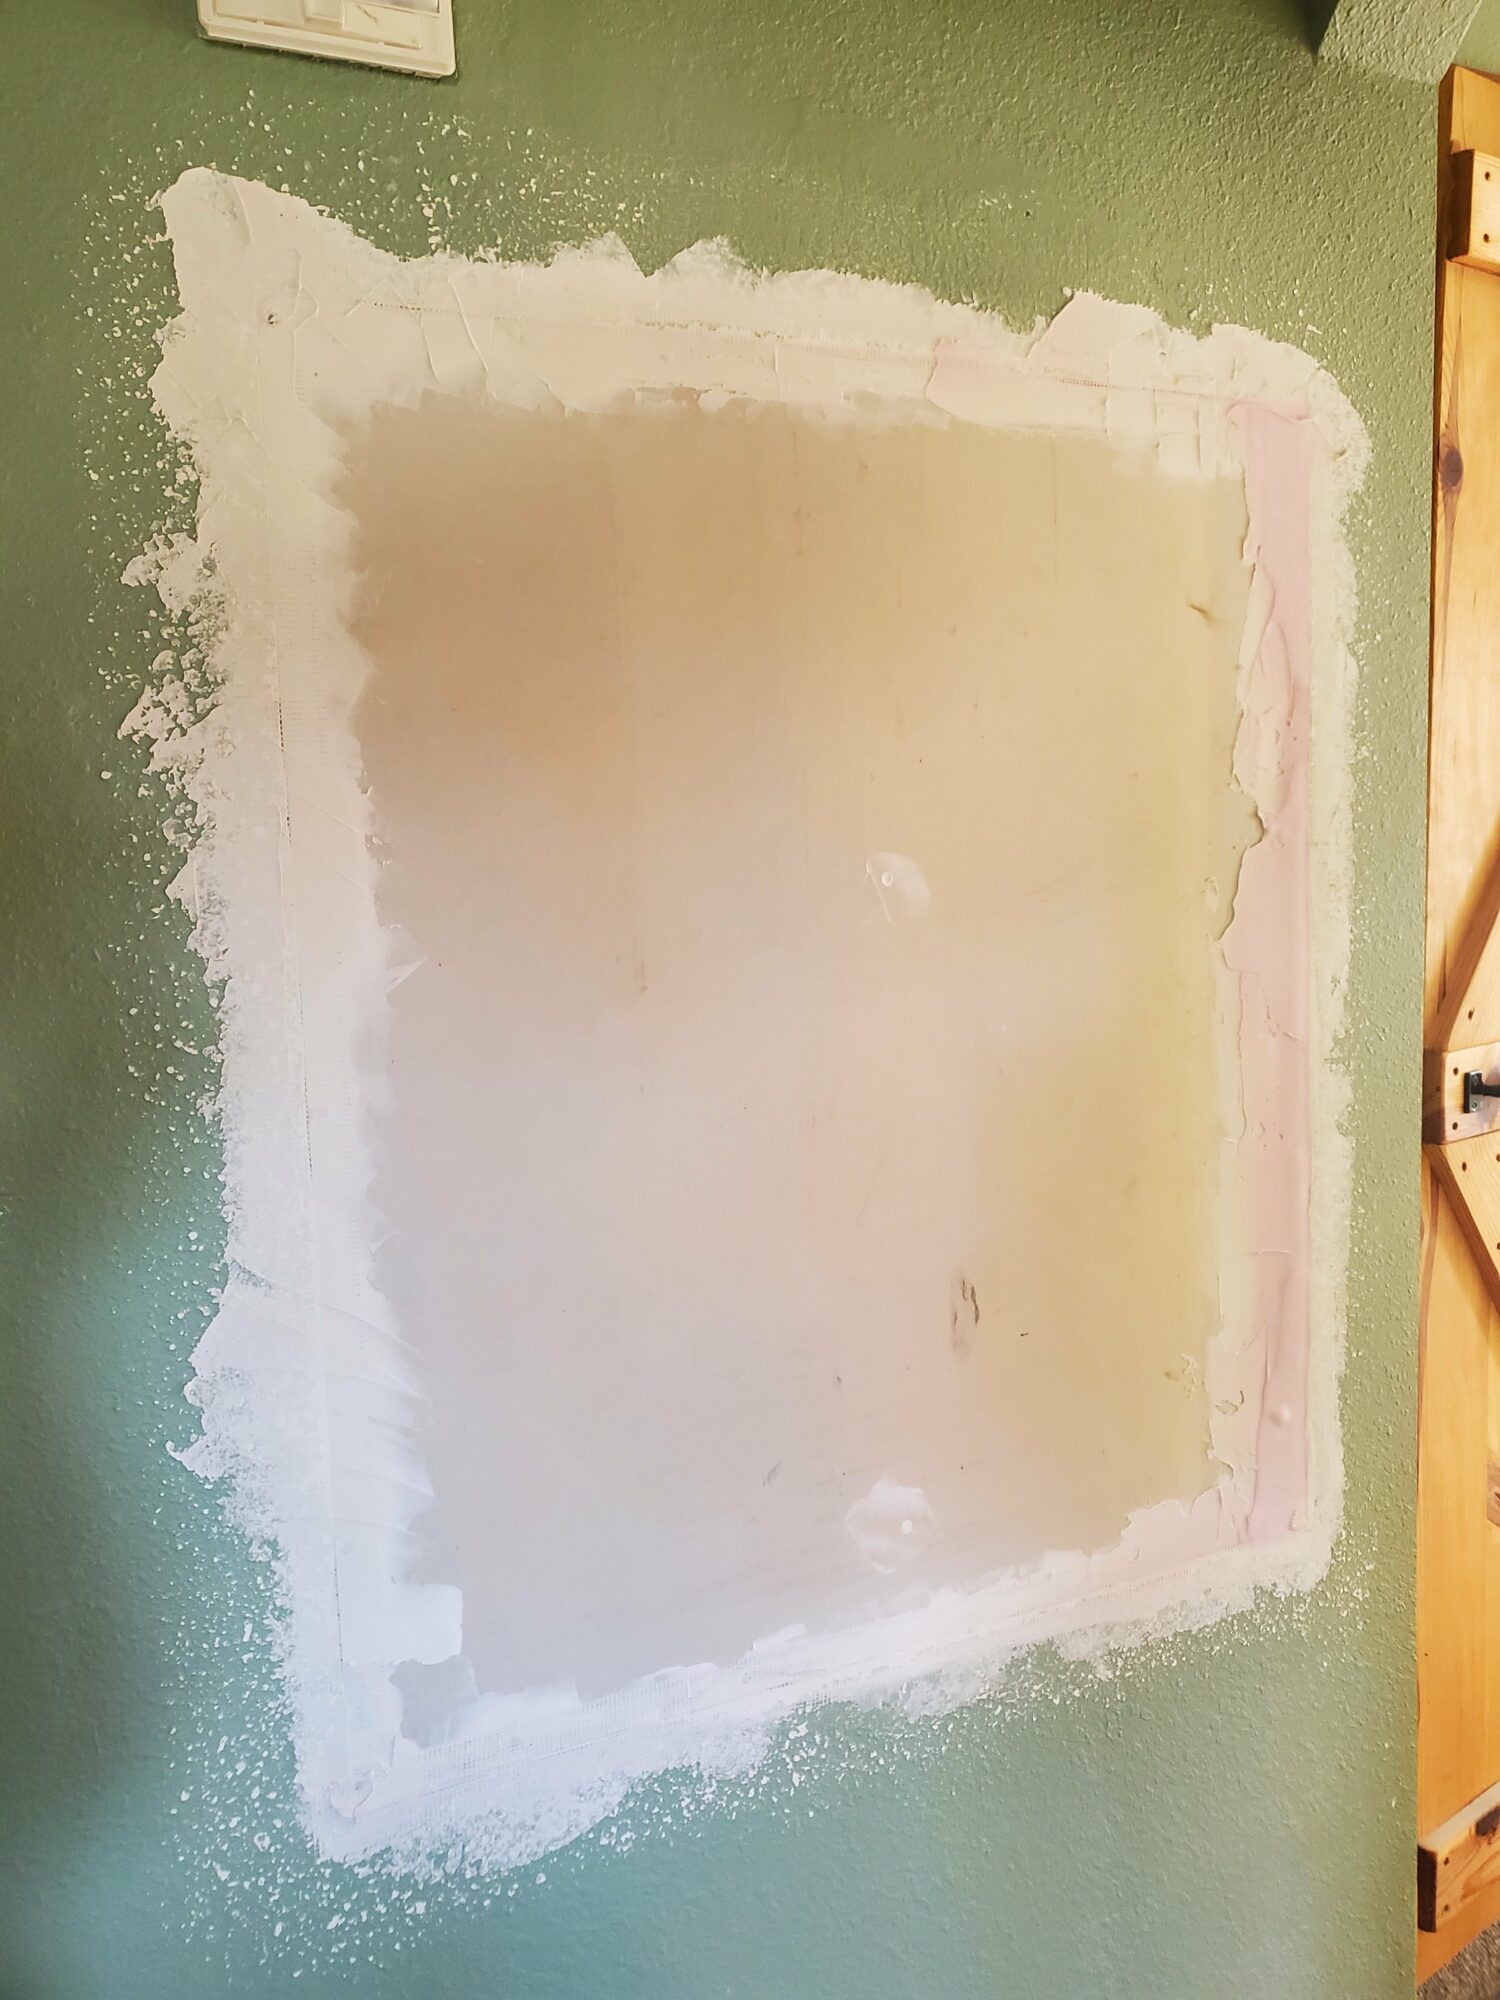
So, that’s about it. Plumbing. Done. Drywall…started. I would do more, but I have this work thing to go back to.