Homer & The Deuce
With colder temps preventing daily commuting in either Jeep, my boredom leads me to contemplate the suspension. Both CJs ride like a 2×4. I find a company close by that carries the kits I’m contemplating.
This is where I decide to philosophically separate the two Jeeps. Homer will have a small 2.5 inch lift and shocks that work offroad, but nothing extreme. The Deuce will get a 4 inch lift to be more of a rock crawler.
Homer gets the BDS springs with Fox 2.0 Shocks. The shackles I end up with have about half an inch of lift, but I didn’t see any no lift shackles that I liked. Plus with the 33 inch tires, the extra half inch would be appreciated.
The Deuce got the Skyjacker kit. While not my favorite, it seems one of the few kits that gave 4 inches. Then I got some beefy M.O.R.E. shackles that gave another inch of lift. It all goes with the theme that the Deuce is not and will not be subtle.
The parts show up very quick, so I tear apart Homer’s suspension and it goes much better than I expected. Several of the bolts look polished from use and wear, but nothing too worn. I can even take the U-bolt nuts off with the impact.
Installing Homer’s new springs and shocks go just as easy. Everything bolts right up with minimal prying. Almost no swearing.
I drop Homer to the ground, torque it all up and take him for a spin. It’s no Cadillac, but man… What a difference.
I spent two days on the project, one for each end. Just taking my time and making sure everything was right. It was always too easy.
The Deuce made up for that.
First issue I ran into was the nuts on the shocks. The top nuts on both front shocks were…. wrong. On one side, it was a lug nut. No seriously… a tapered lug nut. At least it was the correct thread pitch.
Unlike the other side. The PO had forced a standard thread nut on the fine threaded stud. I discovered this when attempting to remove the nut. About halfway off, it just stopped unthreading and spun in place. Luckily, prying behind the shock while lossening the nut forced it off. I was equally luckily that the nut was relatively soft as the threaded stud is welded onto the frame. Running a die down the threads cleaned the remainder of the nut off.
Every U-bolt end had been smashed at one point or another. There was no way the nuts were going to spin, much less off. So, time for the cutoff wheel. So satisfying to utterly butcher something apart. Something metal, I mean. I swear I’m not a sociopath.
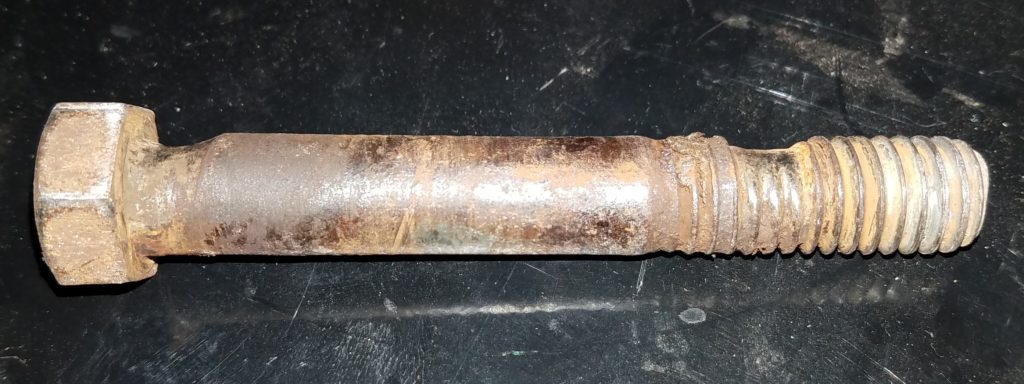
After removing the front springs, I assess the old bolts. Amazing. They are heavily worn and several are grooved on both ends. So, good time to replace them. The front goes back together without too much drama.
Once on the ground I torque the front and grease everything. This is when I realize that my new heavy duty shackles have pressed in, not threaded, grease fittings. I put in a heavy dose of grease…and the fitting stays in the grease gun when I pull it away from the shackle. WTF? Once I realized that there were no threads (while trying to find the correct tap), I just hammered it back on. Like the manufacturer did. My inner engineer screamed the entire time. I’m sure I’ll deal with this issue later, but buts fine now. Just fine.
But the front is down and done and definitely looks like it sits nice and high. Sweet. Onto the rear.
Cue the shit storm.
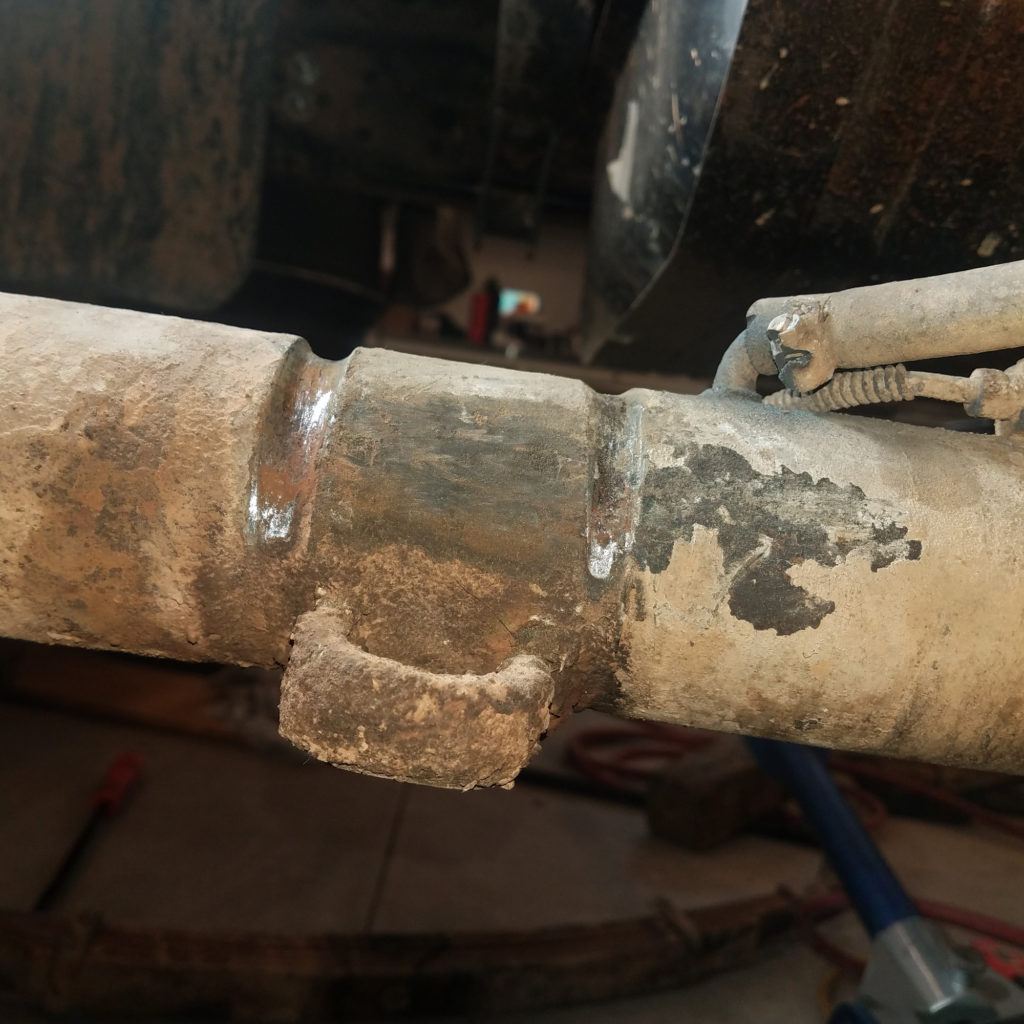
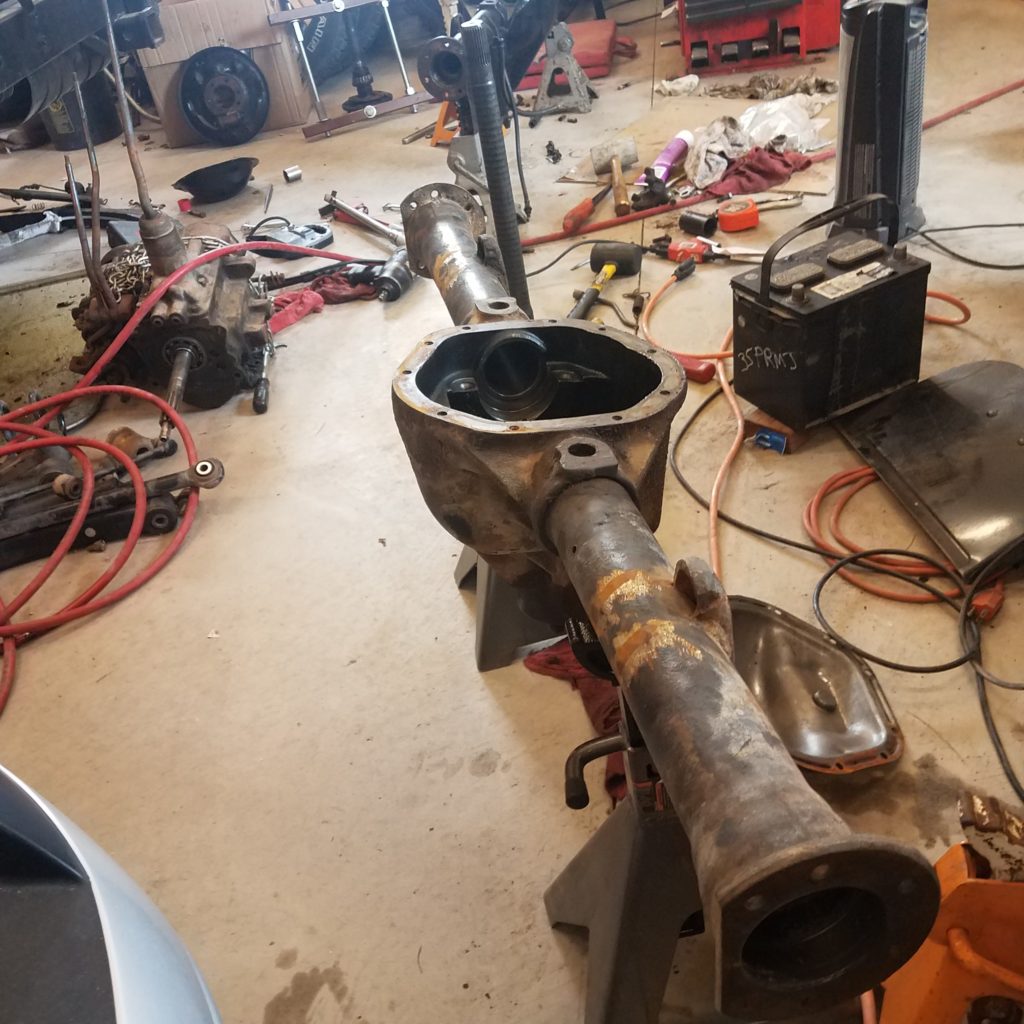
At least the shocks came off relatively easy and just needed some thread cleanup. I cut the U-bolts off, just like the fronts. Or at least started to. I stopped because it appeared I was cutting into the axle tube… On both sides of the U-bolts. Since I was keeping the deepest part of the cutoff wheel centered in the bolt, I assumed it was just homemade undercoating: a thick layer of grease and dirt. And to a small extent, it was. Once all the dirt was scrapped off, it became painfully obvious that the U-bolt was sunk INTO the axle tube.
OK. What. The. Fuck?
I decide I can’t stop now but how to remove the bolts without cutting the axle tube. More out of frustration than anything, I smack the bottom (bent) end of the U-bolts with a BFG…. And they actually pop up. Tap them over to the side a bit so they won’t fall back into the groove and finish the cut.
Just baffled, I go to the other side and same thing. There are four DEEP grooves in the top of the axle tubes. Arg. The actual words I spoke typically had a fourth letter.
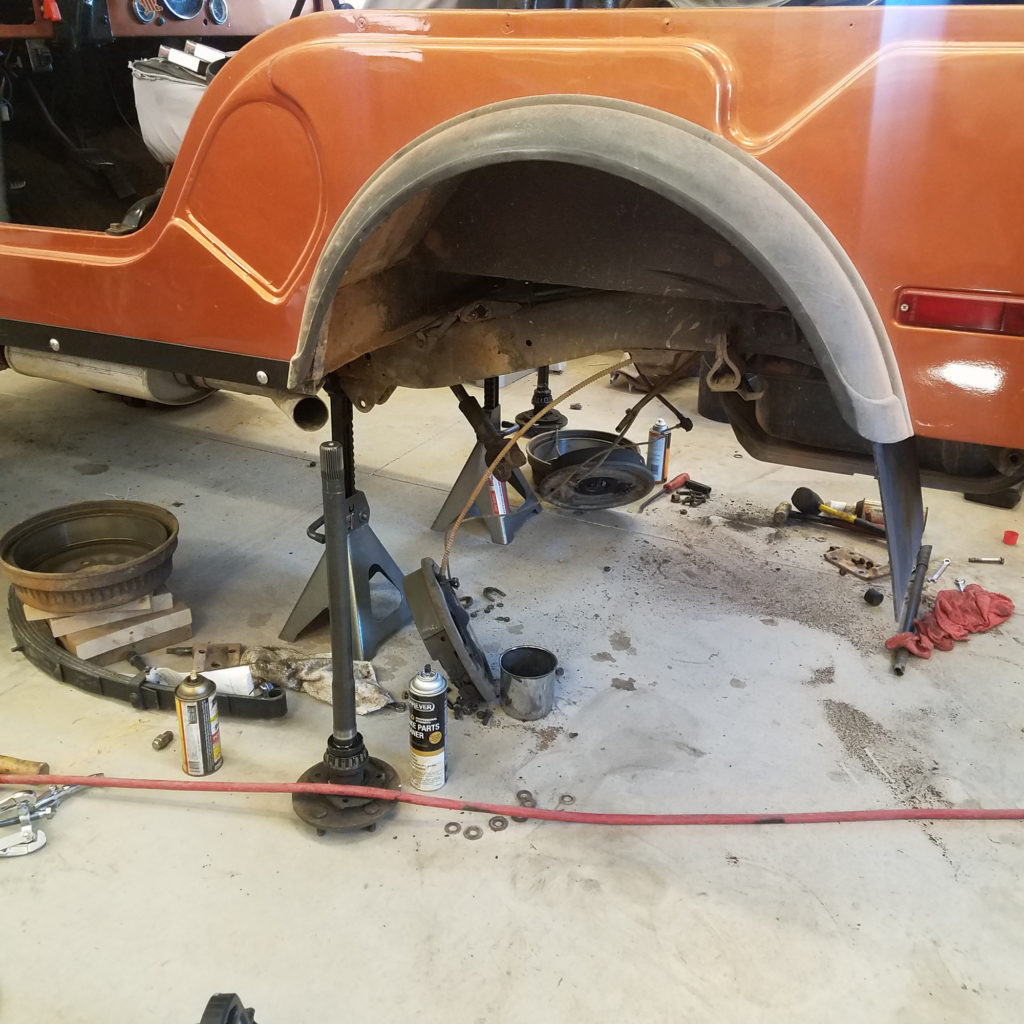
Well, the axle needs to come out now. Off come the brake hose, brake backing plate with shoes and all, and then yank out the axles. All relatively straight forward.
I remove the rear shackles and lay them on the floor. That when I realize how badly bent they are. The side are no longer flat from top to bottom. One side is notably worst, but I didn’t keep track of which side. Moving on.
As I was loosening the forward leaf spring mounts, I noticed a bit of slop and the bolts themselves had deep, heavy notches in them. No wonder it felt like the back end randomly changed directions. Upon further inspection, the forward mounting holes are no longer round either. So, the bolts exacted some payback for their loss of metal. Great. The holes are bigger on the right half of the mounts, but the left side isn’t the original size either.
Obviously, the CJ has too much motor. The rear axle was twisting the leaf springs to the right and the axle housing was rocking axlially inside the U-bolts. I should feel lucky the rear didn’t go on its separate way yet.
With the axle out, I measure the worst groove to be more than halfway through the tube. The other three aren’t that far behind.
I start looking for a Dana 44 rear end housing.
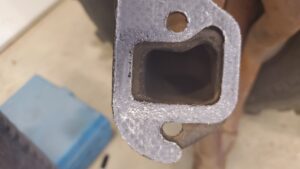
Did you know that in 1976 AMC decided to use its own rear end in the CJ5? The AMC 20 is known as the axle that everyone yanks out and replaces with a Dana 44 from earlier year CJs. Do you know how hard that makes finding one of the narrow track Dana 44 rear axles?
Let’s just say that there aren’t a lot available, and those that are I would not categorize as inexpensive. Several people mention that it could be welded up. I was worried about putting a lot of heat on just one side of the tube causing it to bend. However, after three weeks of searching for a housing, I fold and call around for a welder. I find a company that repairs big trucks and trailers, and they are comfortable with the job. I take it down and drop it off.
Now, as luck would have it, I found a housing a few days later. It is a few hours away, but I need to head that way for work anyway. Sweet. I check some of the other classifieds and find a transmission, transfer case and overdrive combo from a 1971. Man, what a deal. And work will pay for the trip. Score!
Two day later and I’m picking it up. It’s got an open diff with 3.73 gears. Actually, it has “the stock gears” in it. The old guy didn’t remember which ones, but I figure I’ll swap my detroit locker over with the correct gears anyway. Grab the transmission and t-case assembly that looks like it was dug out of a barn, but it turns over and shifts smoothly. Honestly, at the price I paid, it could have been empty cases and still worth it. Head back home with my new booty.
Tearing into the “new” axle confirms it is a 3.73 and there is just a tiny bit of surface rust that wipes off easily. Overall, pretty decent shape. I have to wait another week for my old axle to get welded due to some silly family holiday.
In the meantime, I tear into the transfer case and unbolt the overdrive. So excited… Until I pull it off the back. There are a lot of different configurations of overdrives, but I thought if it fit a 1971, it would be what I needed. Nope. Turns out I bought a T90 trans instead of the T14 that is in my 1971. What that means is that the output spline for the overdrive to mount to is a 6 spline instead of the 10 spline I need. Great. At least it still works great. Maybe someone will trade it for me. So, that project is stalled.
When I get my old axle back, it doesn’t look too bad, but it just doesn’t give me confidence to wheel it hard. So, time to transplant the diff.
While looking over both diffs, it looks like the new axle has a bearing cap on backwards, judging by the stamps. It’s on the correct side, but obviously turned around as shown by the inner machining. Ah, bad mechanics. I swear they are here just to make me feel smart.
I’ve set up a Toyota third member before, but never a Dana 44. While the idea is similar, I will miss not having it up on the bench or being able to dial in the backlash. Shims are easy, right?
I make a set of setup bearings, which actually goes quite well. It just makes everything gritty. I clean everything as best I could, but I do live in the desert with sand always finding a way in.
After 4 attempts at setting pinion placement, multiple adjustments of the backlash, and checking the wipe pattern, I’m no closer to getting a pattern I like. Heck, I haven’t even seen the pattern on any of the example patterns. So I decide to use the “OEM shim thickness” as provided by the gear company that sold me the master rebuild kit. Here’s a fun note: there are multiple sources that given setup numbers for a Dana 44, all with slightly different numbers. Great. That doesn’t confuse me at all.
It’s been two weeks of half-hearted attempts to get the ring and pinion dialed in, and then I bail on it for a while. Family visits and time off work for traveling.